Chapter Seven
The Quiet Layer: Insulating a Historic Home for the Next Century
"Sometimes the most expensive lessons aren't about choosing the wrong solution—they're about making the right decision too early."
The Story
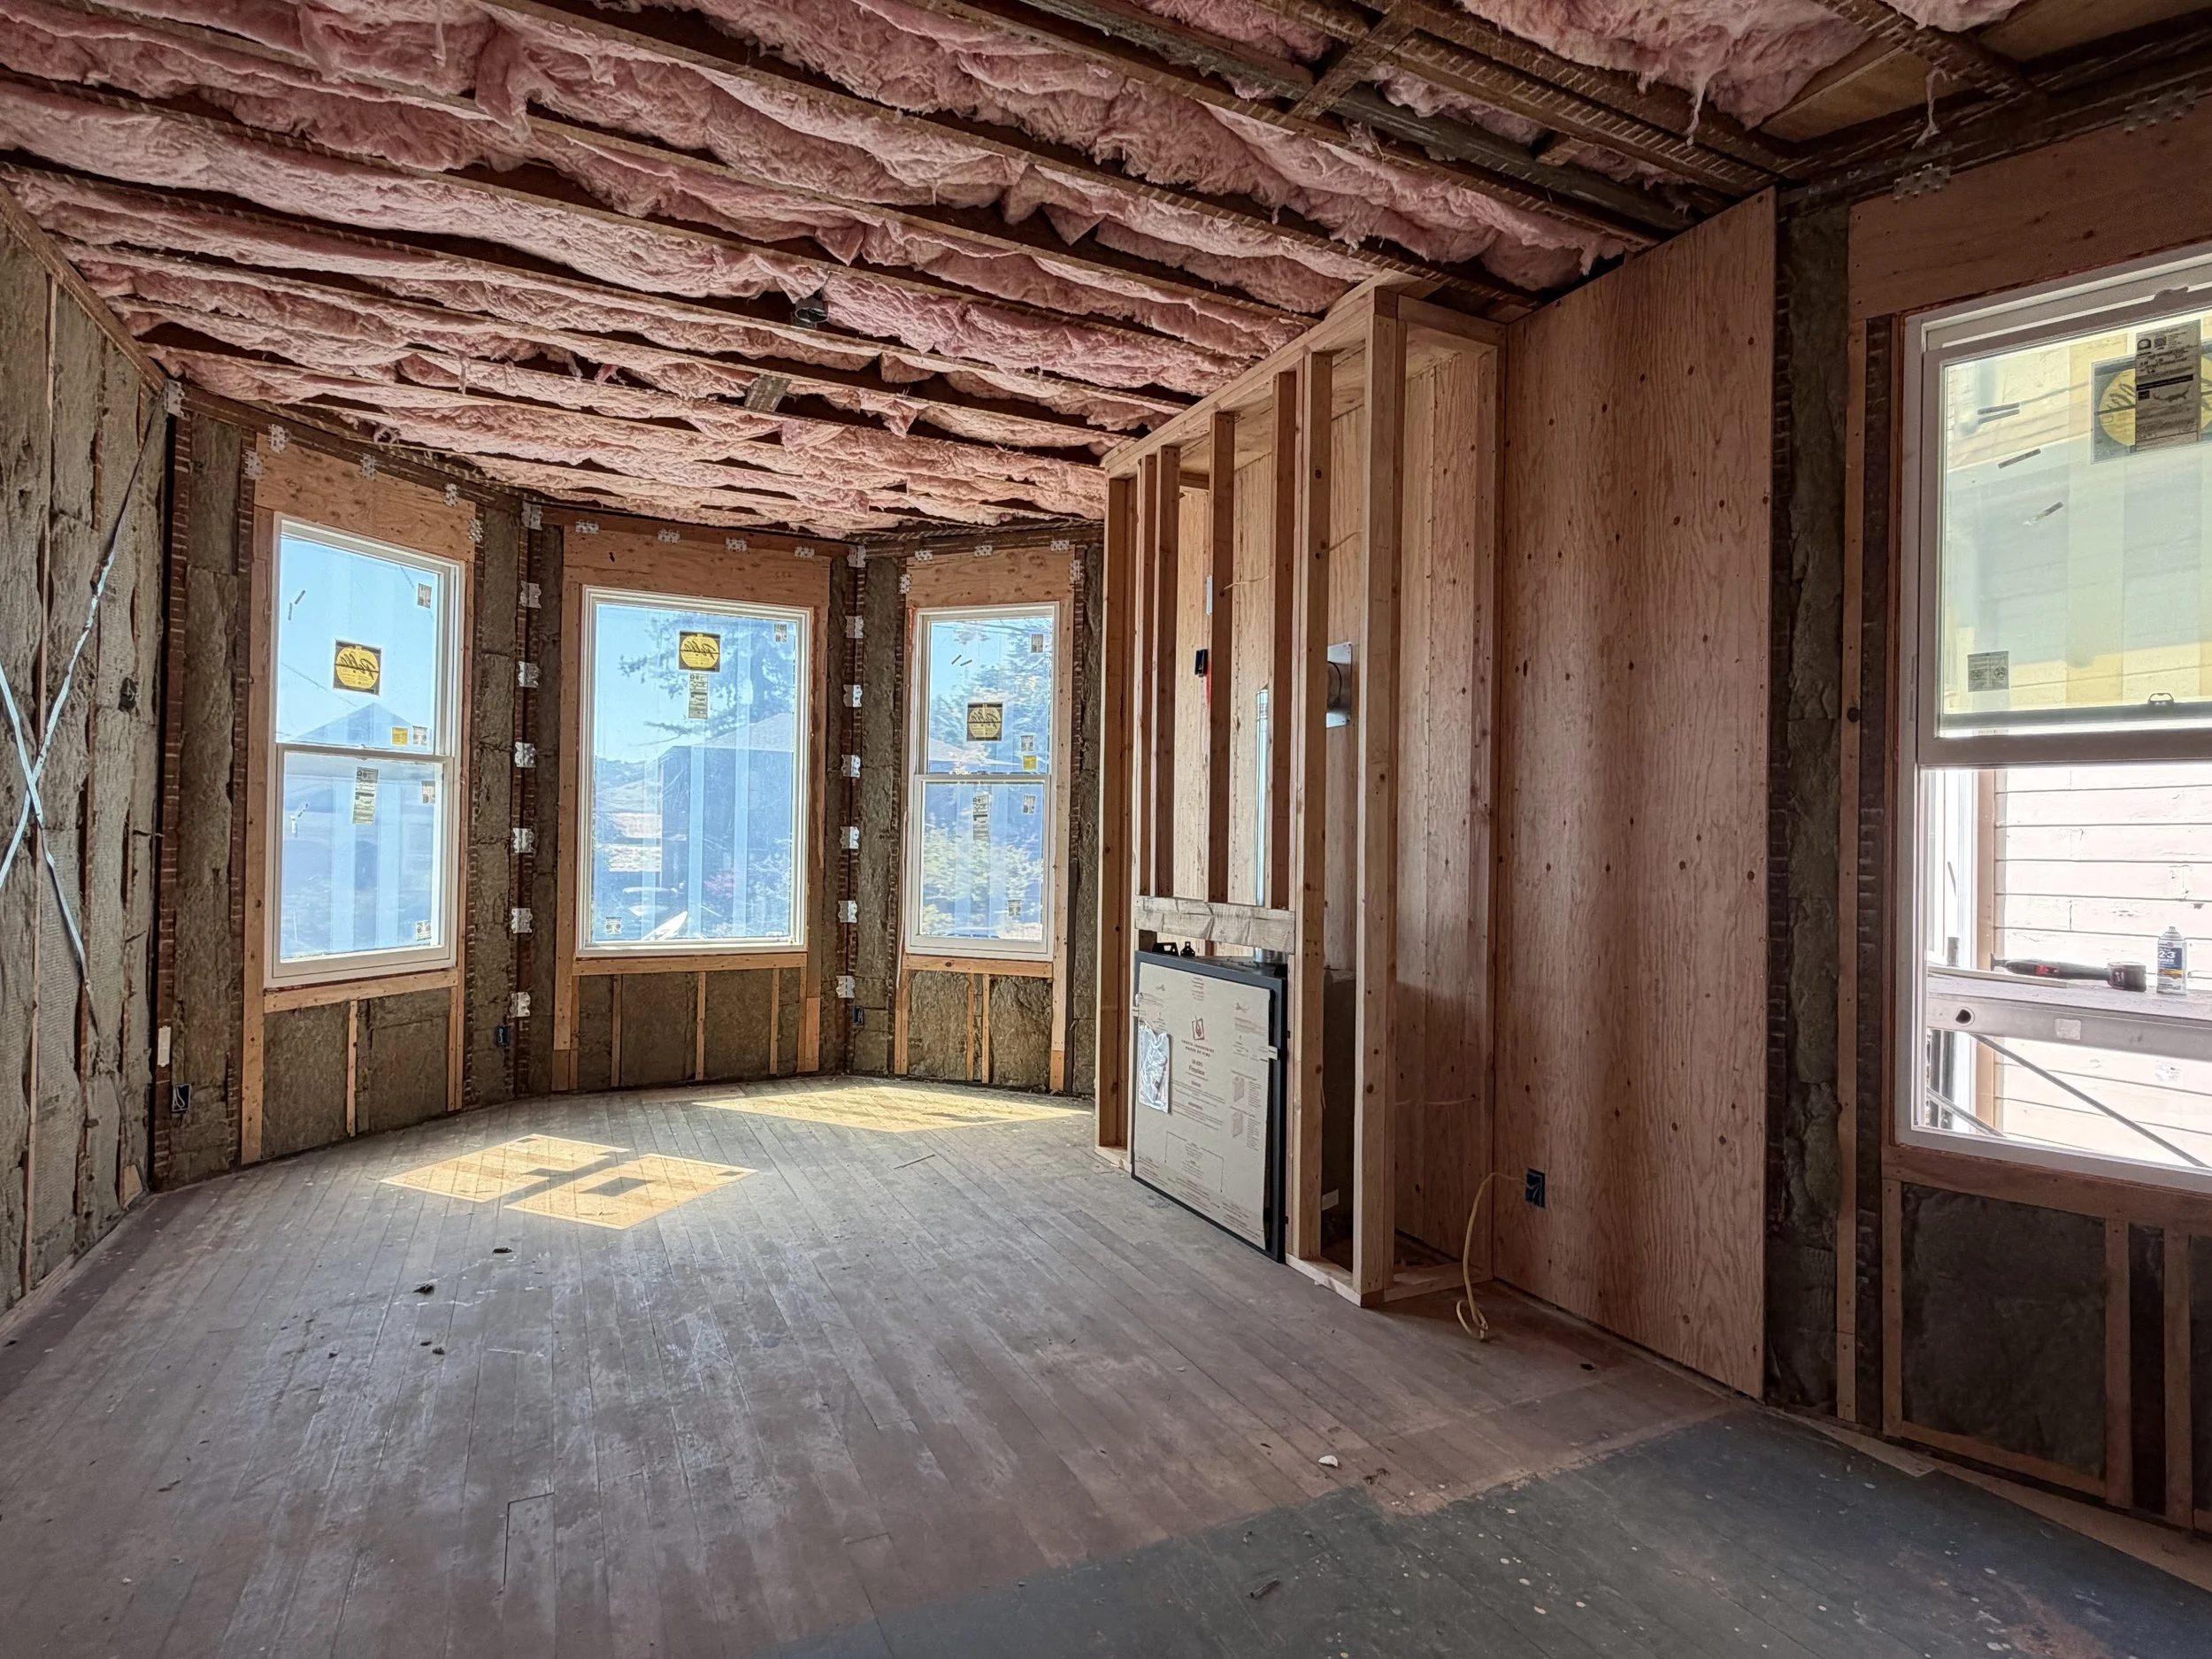
Of all the hidden systems we tackled during this restoration, insulation was probably the greatest pain point. I expected plumbing to be complicated. I knew HVAC would require planning. Electrical had hundreds of decisions attached to it.
Insulation? I thought we would simply determine the appropriate R-value, choose a product, and fill the walls. Instead, insulating a 135-year-old Folk Victorian built almost entirely of redwood introduced questions I had never considered.
This house was built long before modern weather barriers became standard construction practice. Behind the original redwood siding there was no building paper separating the siding from the wall cavities. The house had survived remarkably well that way for more than a century. But adding modern insulation changed the equation. We needed to improve energy efficiency without trapping moisture against the back of the redwood or creating an environment where mold could develop inside walls we would no longer be able to see.
What I thought would be one of the simplest phases of construction became one of the most researched, discussed, and ultimately expensive, decisions of the project.
The Challenge
The difficulty wasn't simply choosing insulation. It was understanding how modern materials would interact with a house built using completely different construction methods. We had many conversations about moisture. Would adding insulation prevent the wall from drying properly? Did we need a barrier between the insulation and the original redwood? Where would closed-cell foam be appropriate? Where would fiberglass make more sense? What role could mineral wool play? Would different parts of the house require different solutions?
I found myself learning about closed-cell foam, paper backing, moisture management, R-values, and insulation products I had never heard of before this renovation. And because protecting the original redwood was so important, we approached the decision cautiously. At the time, that felt like exactly the right thing to do.
What we couldn't fully appreciate yet was how much the condition of the house itself would change before insulation was actually installed.
The Design Decision
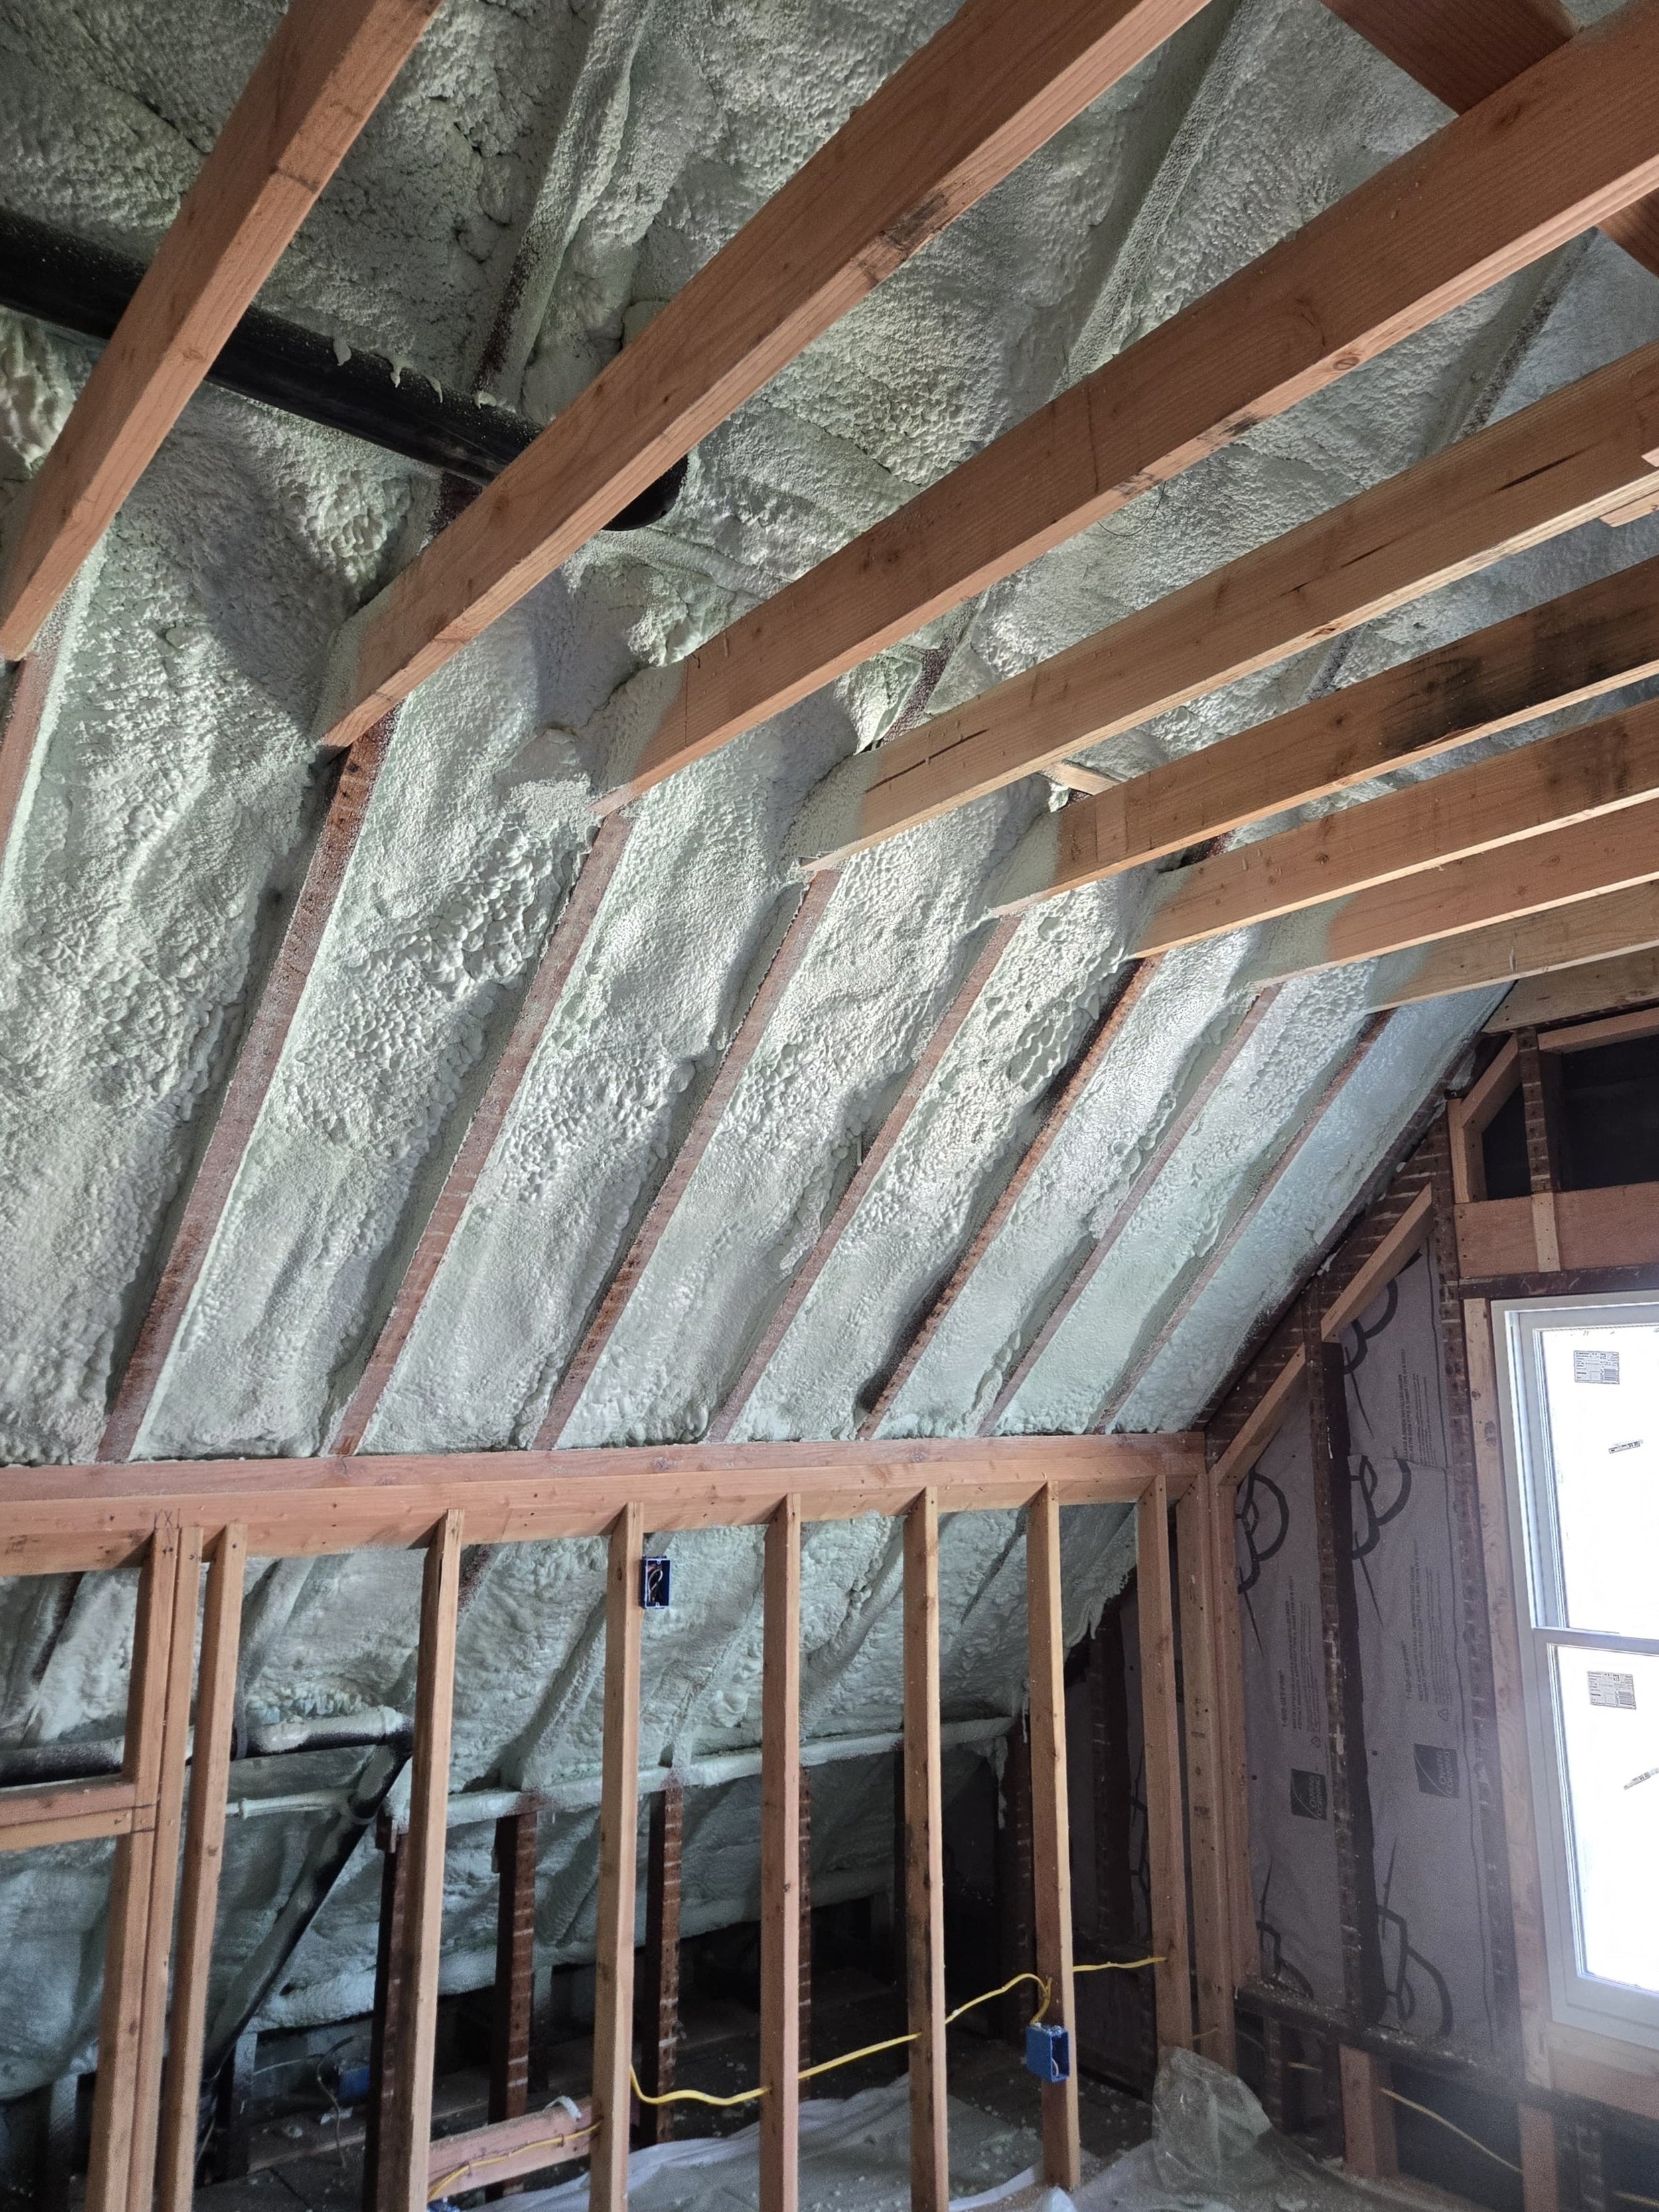
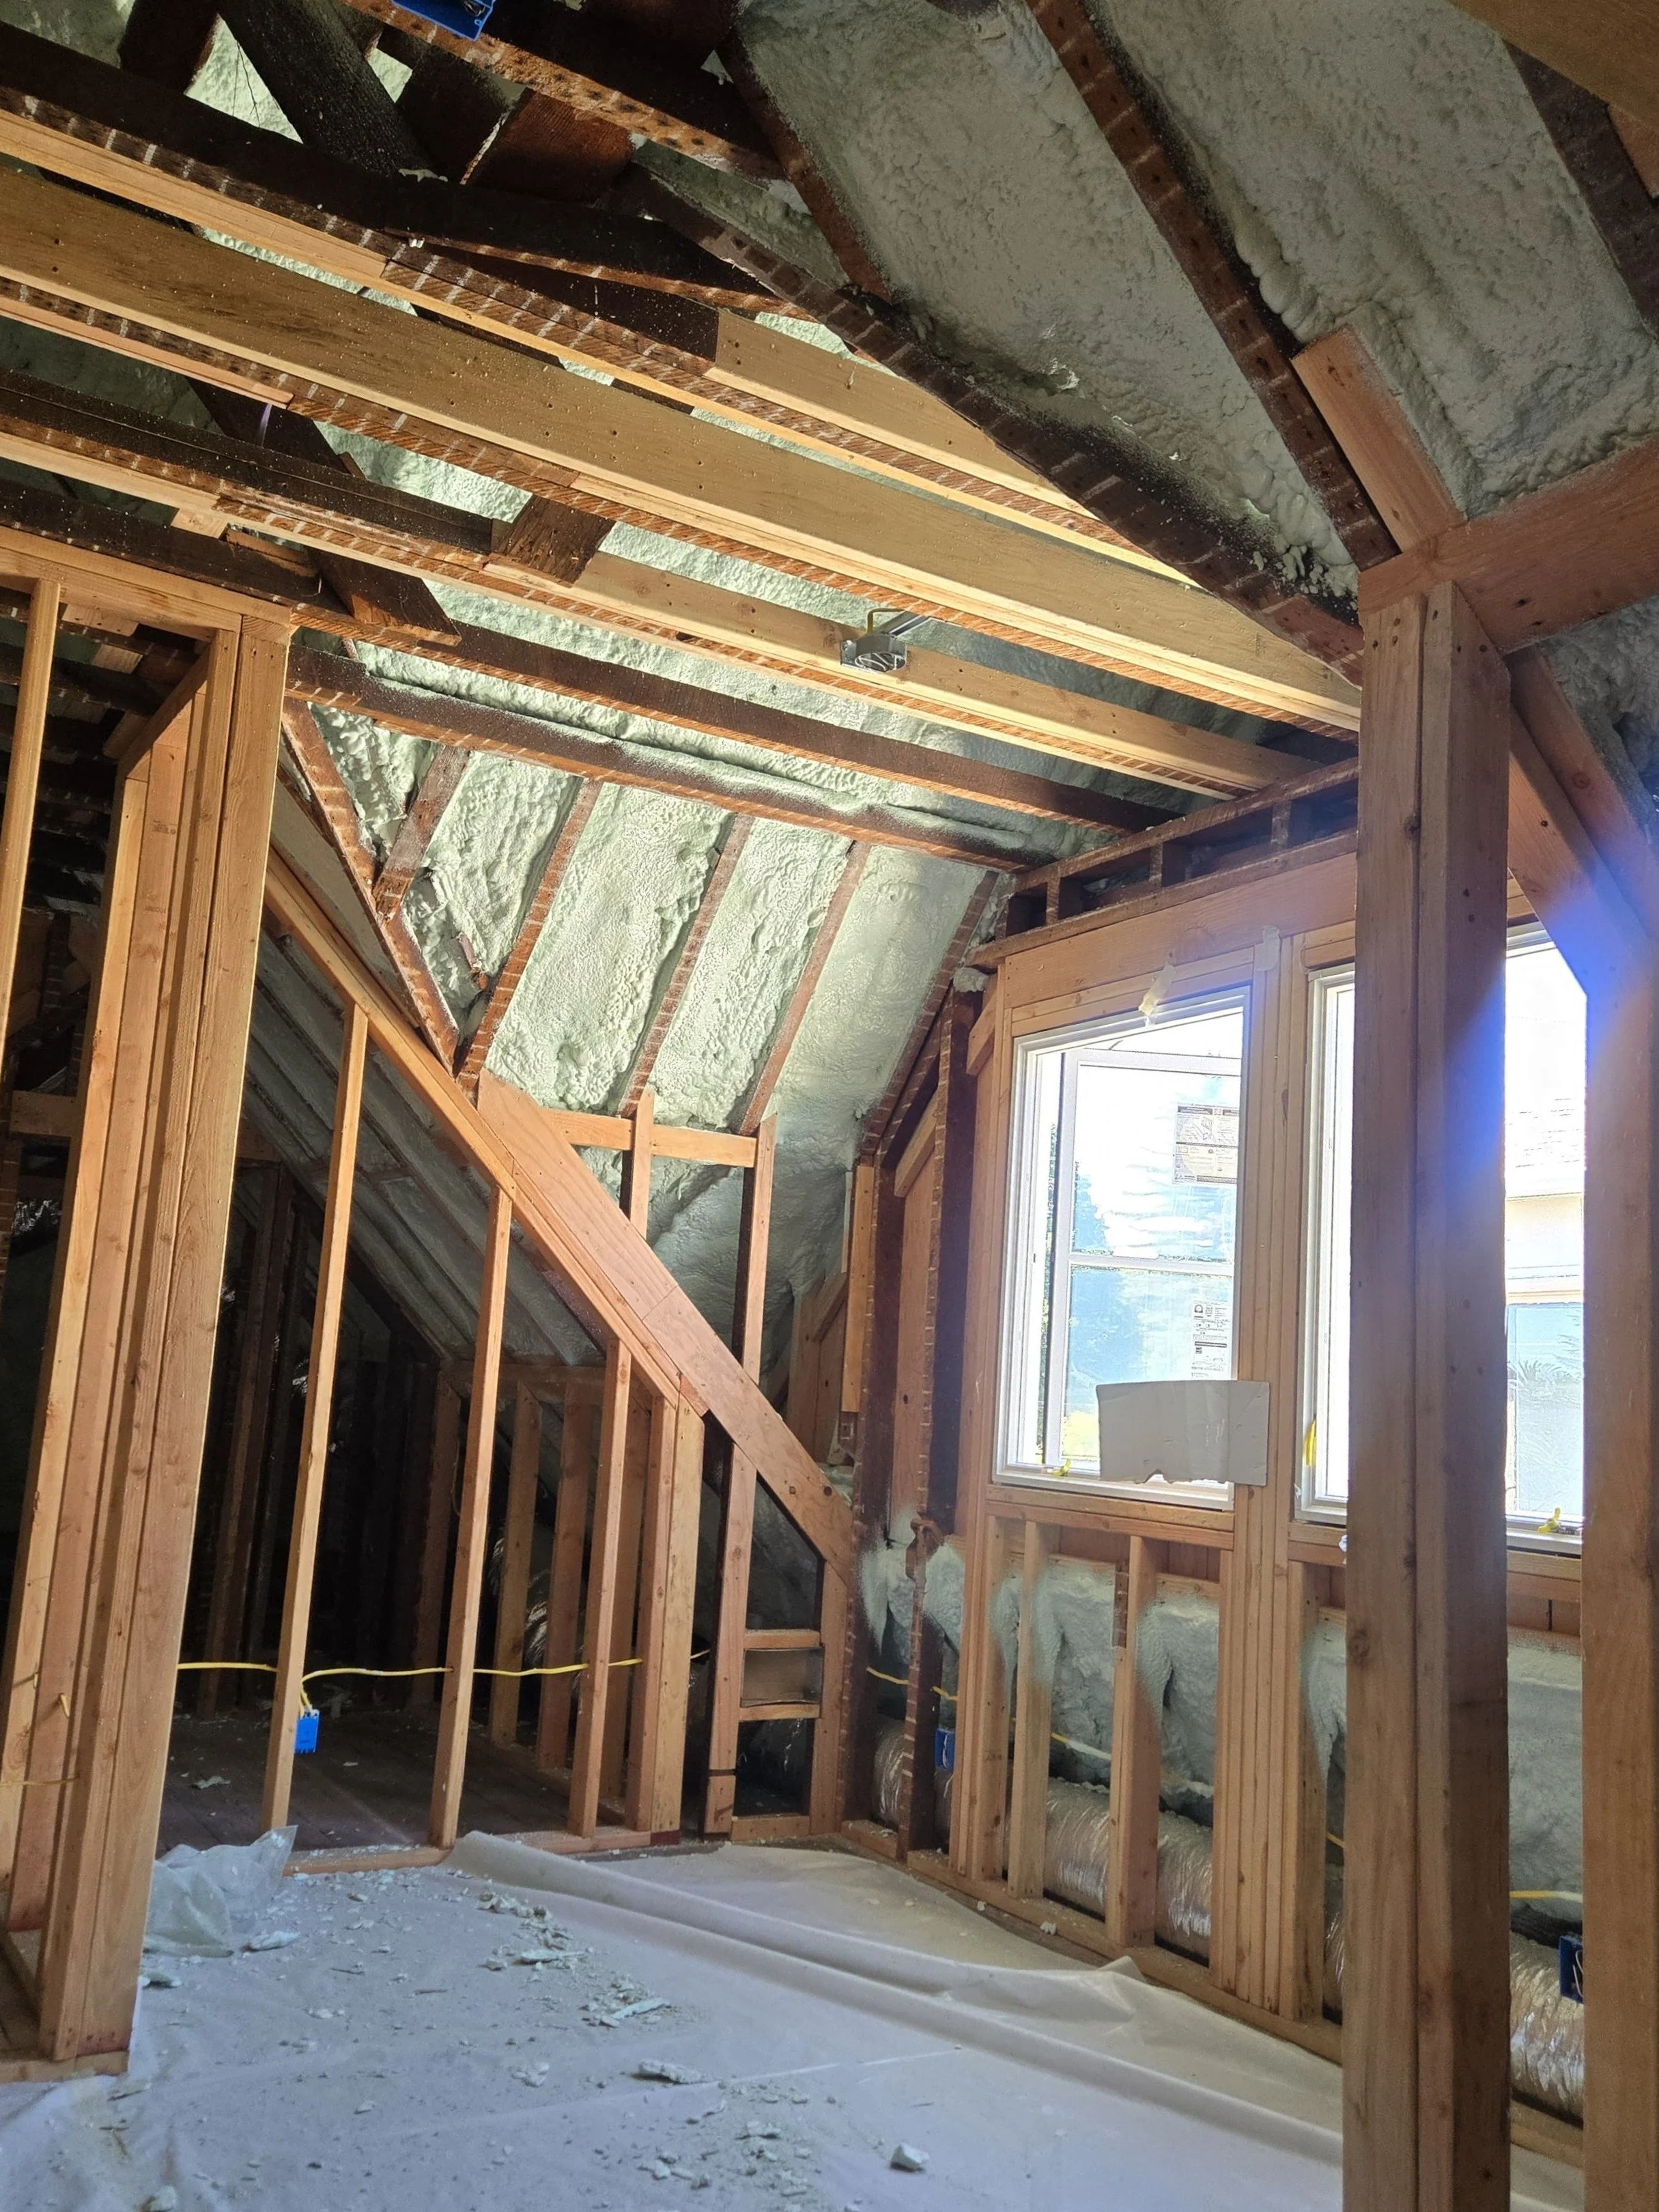
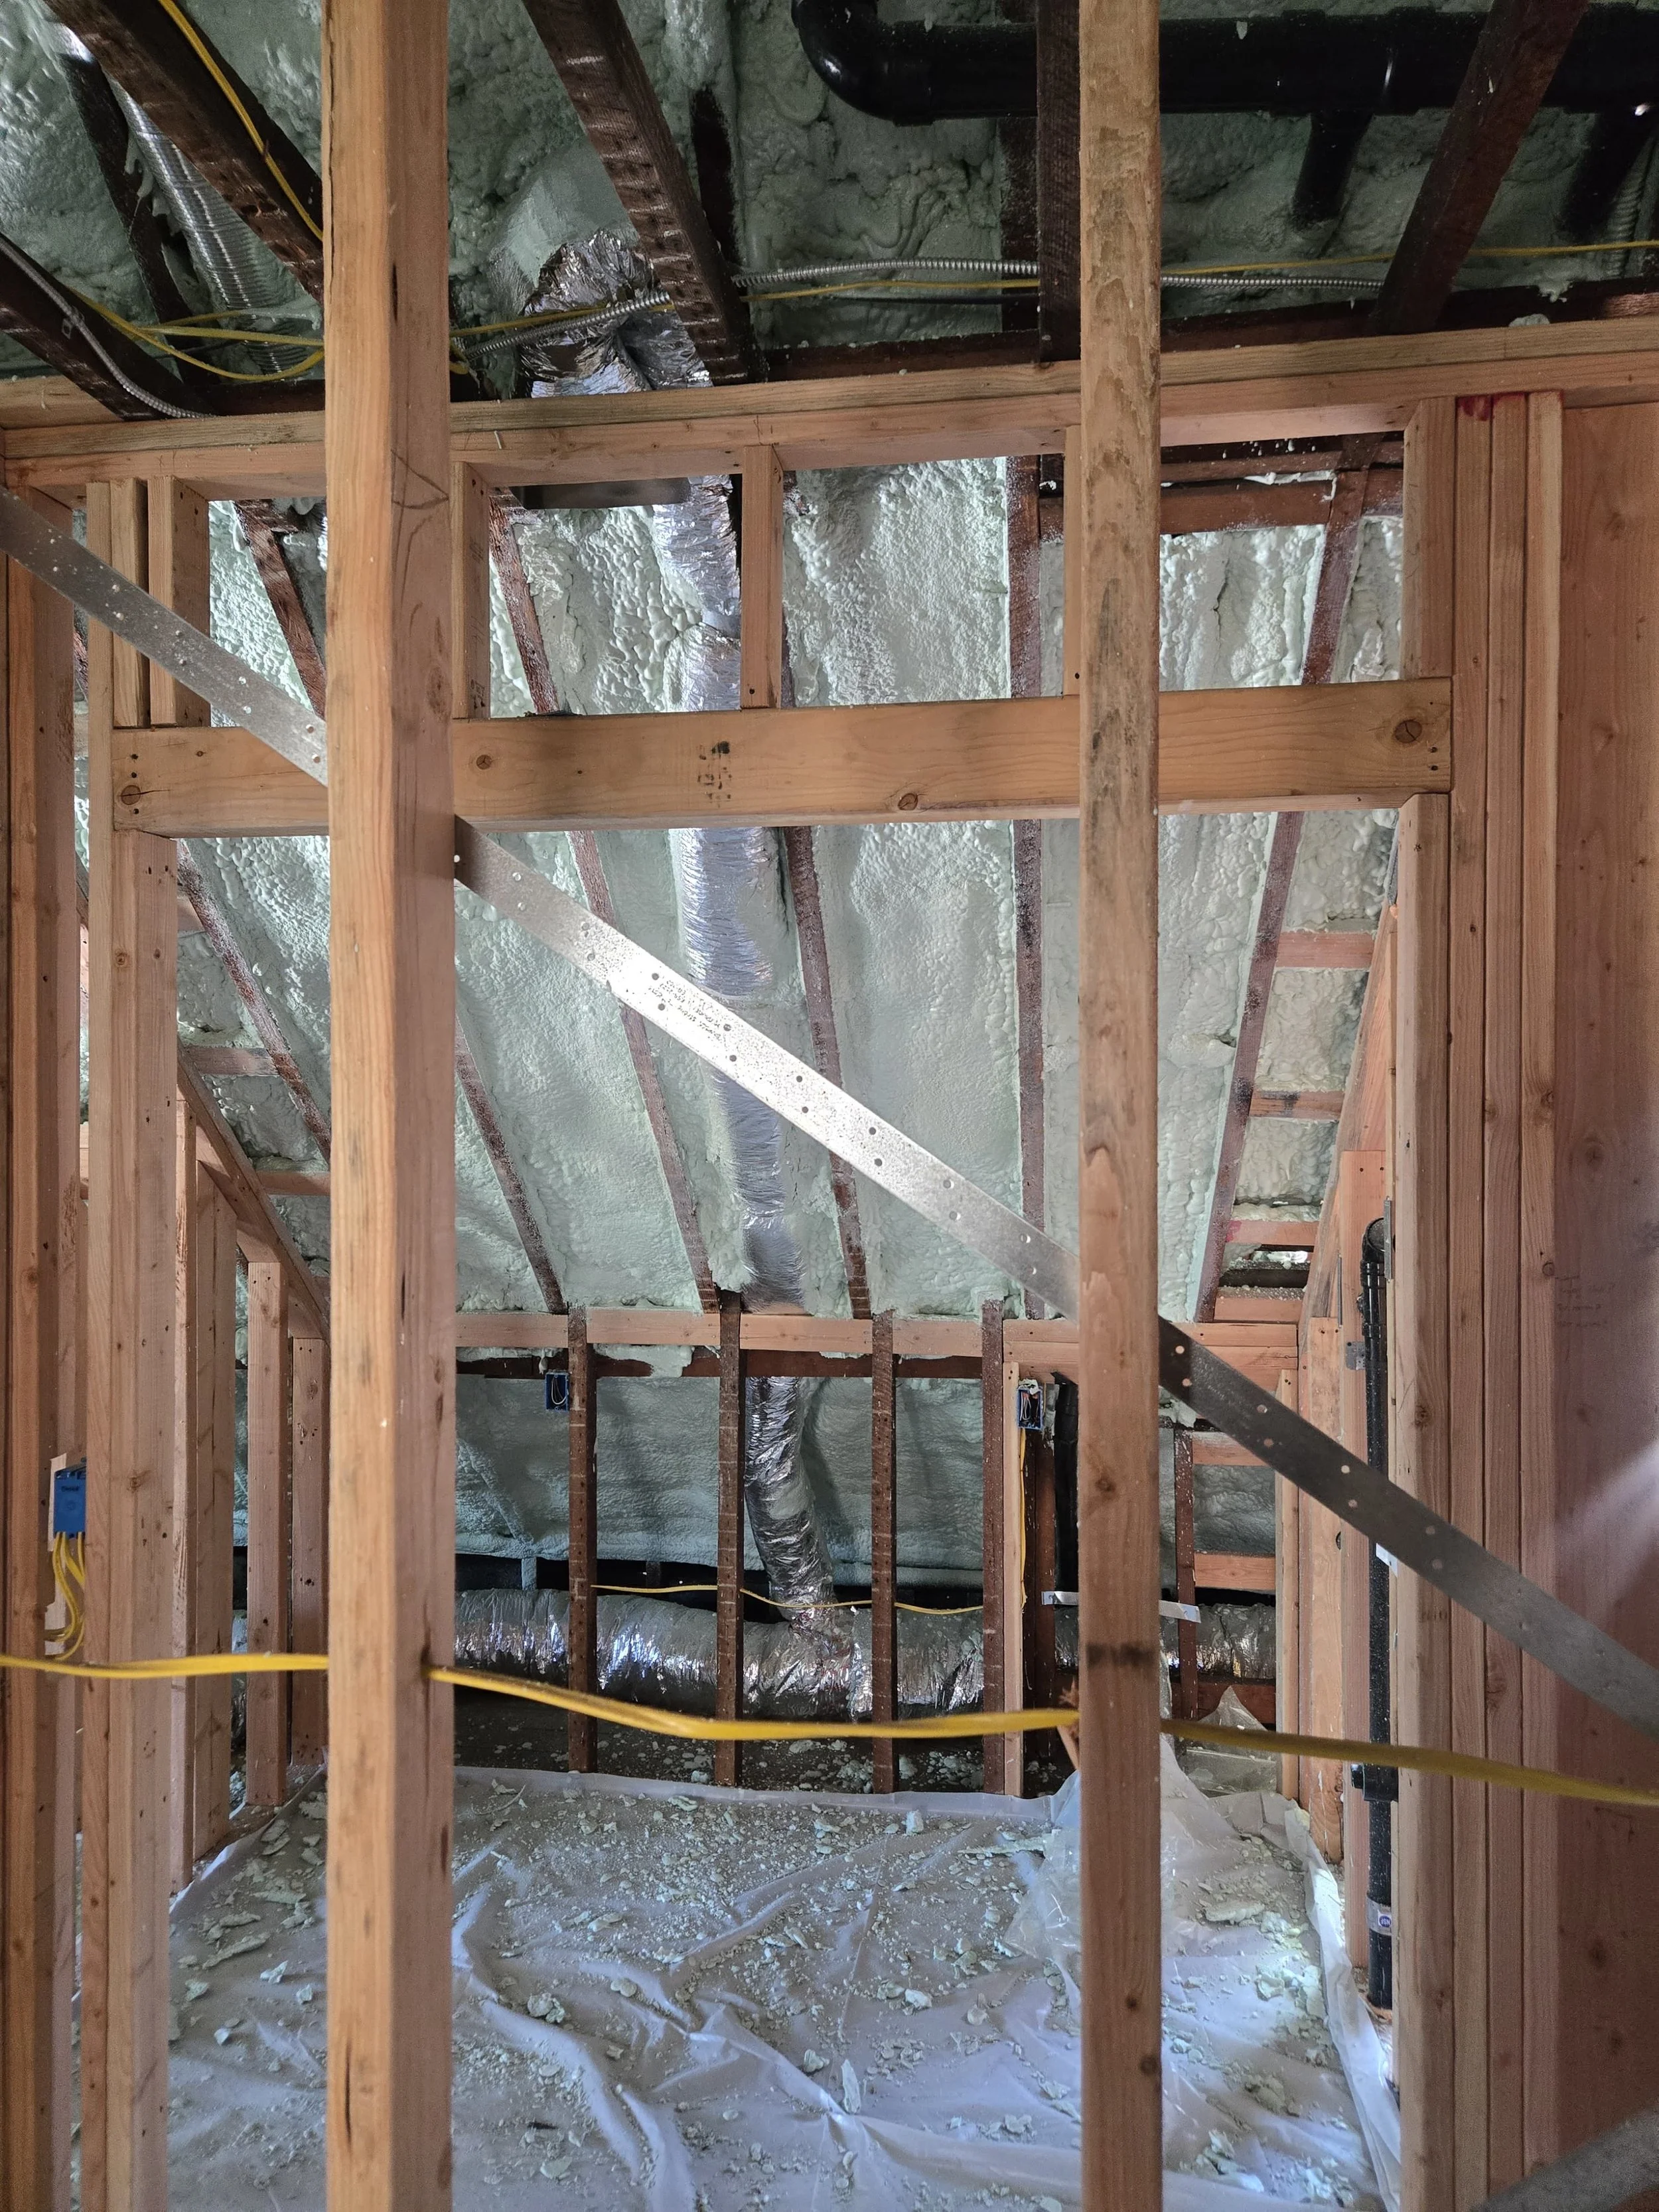
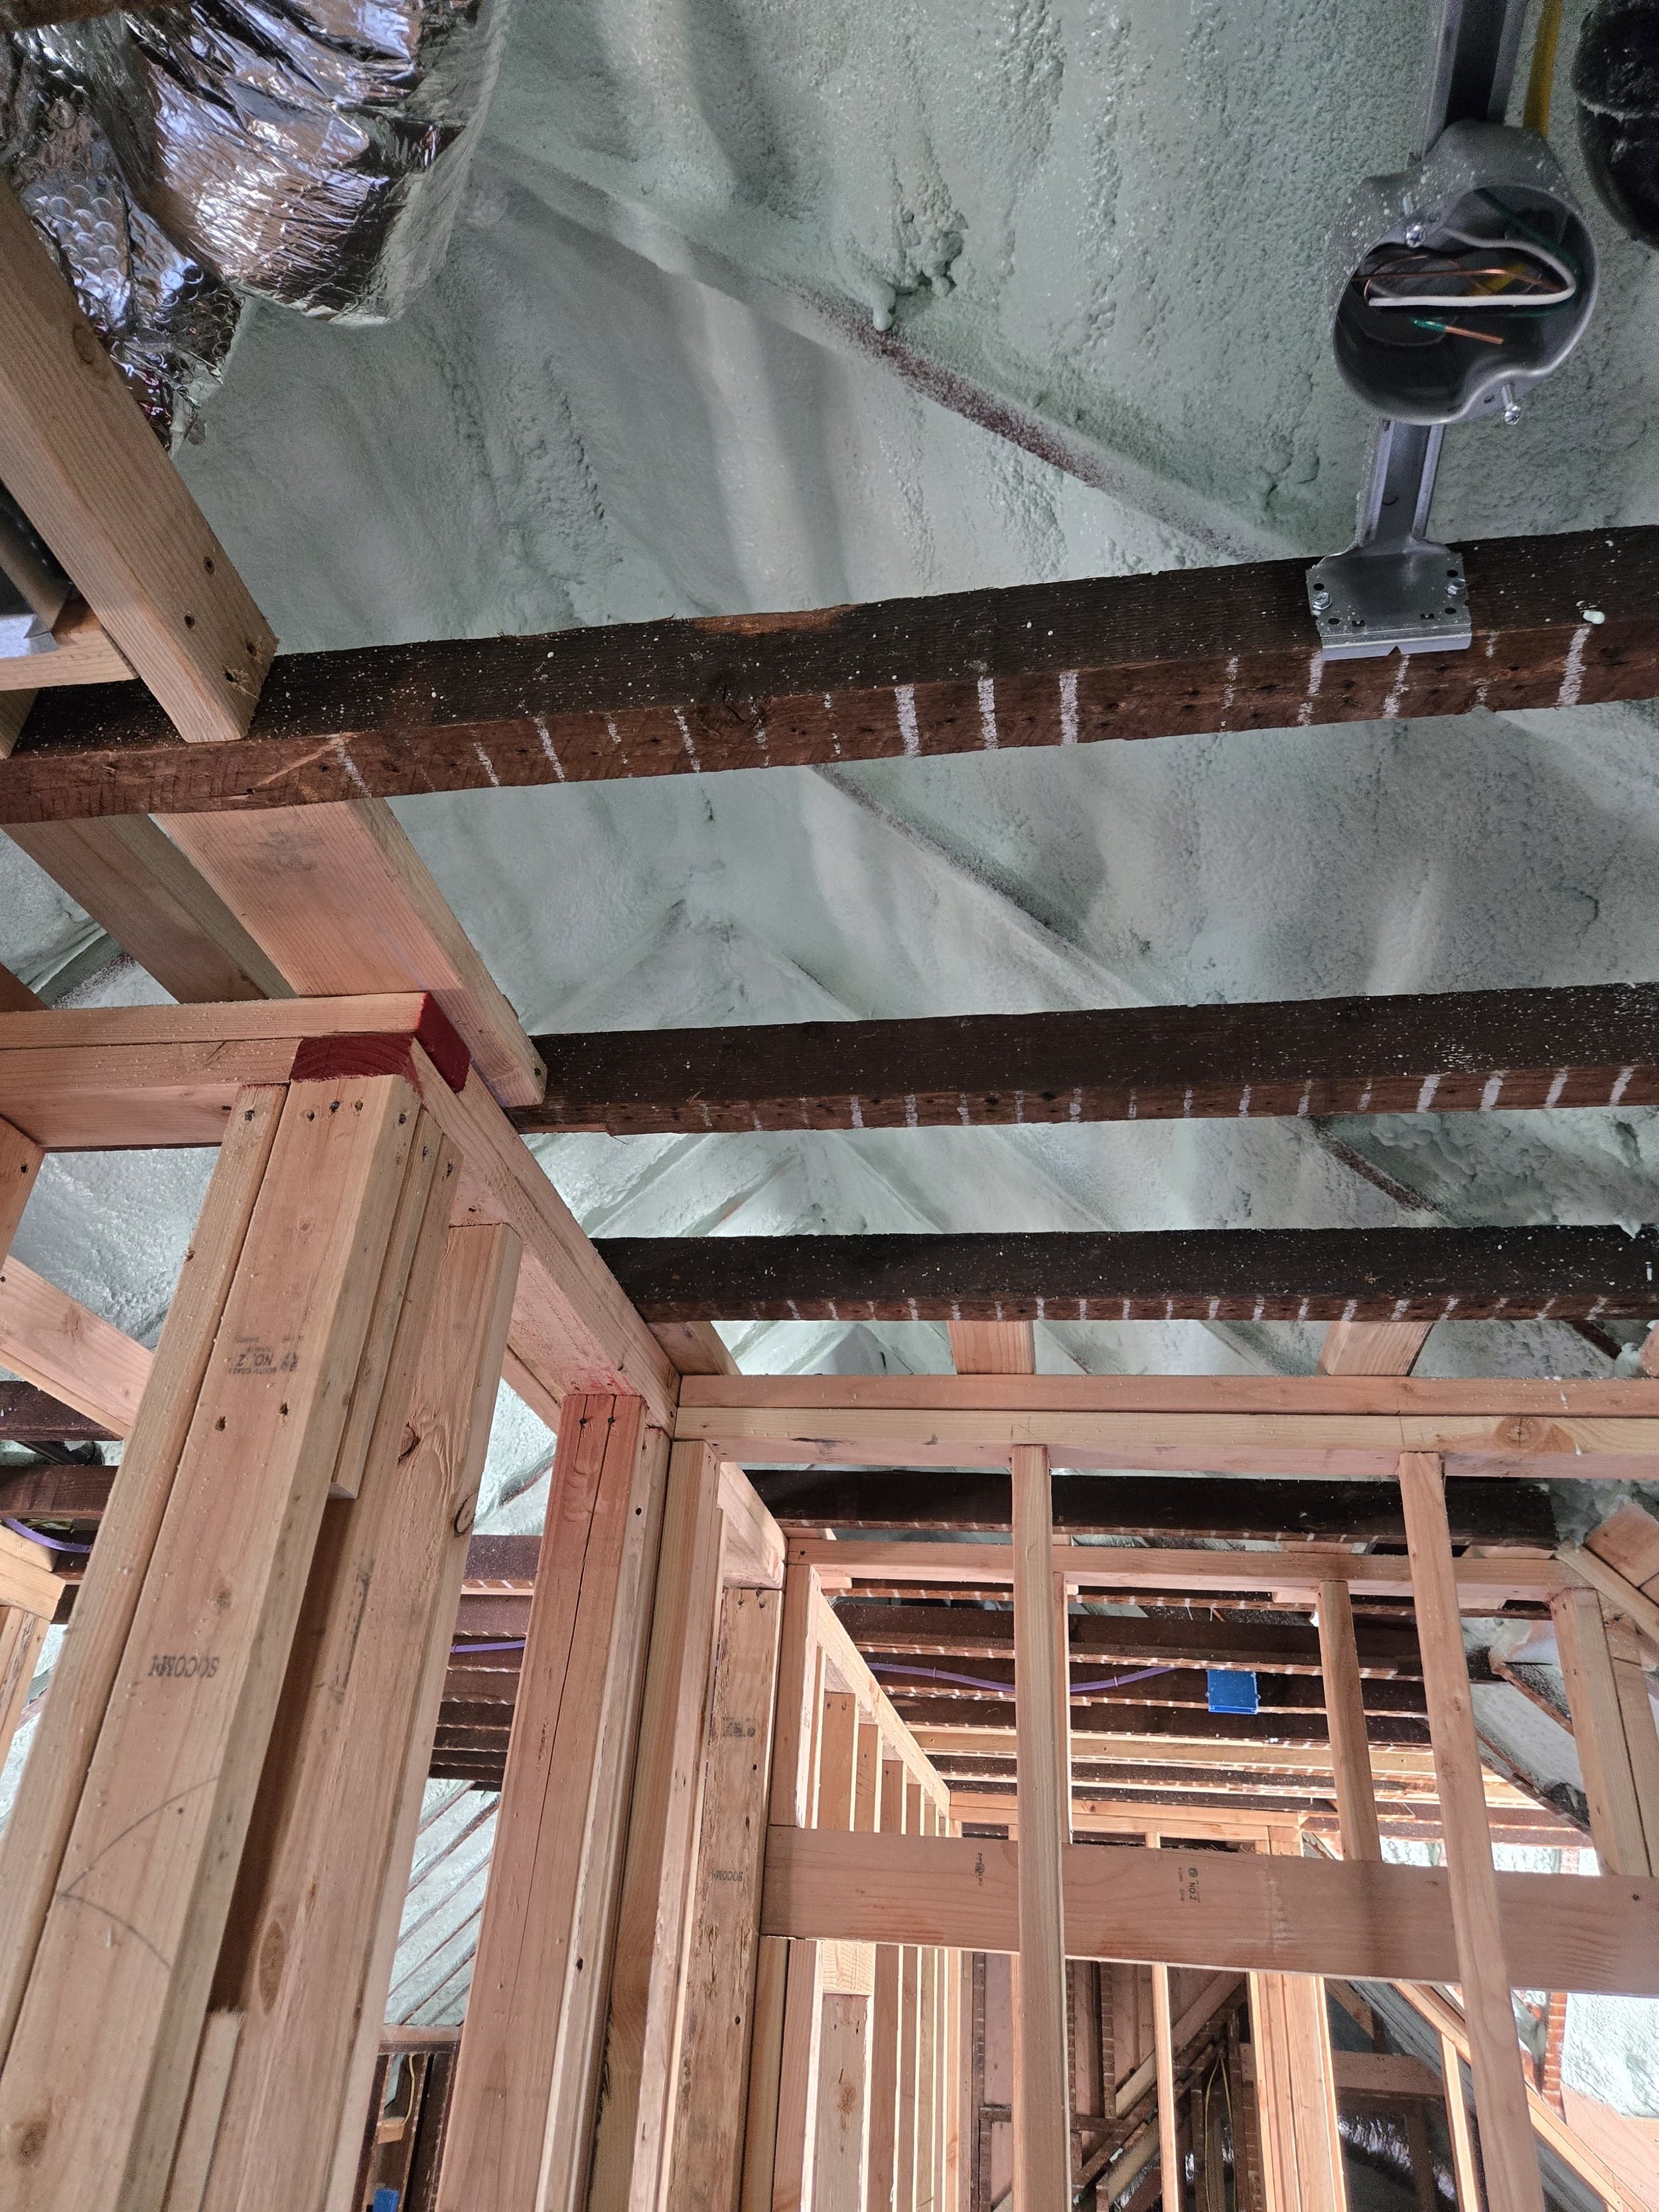
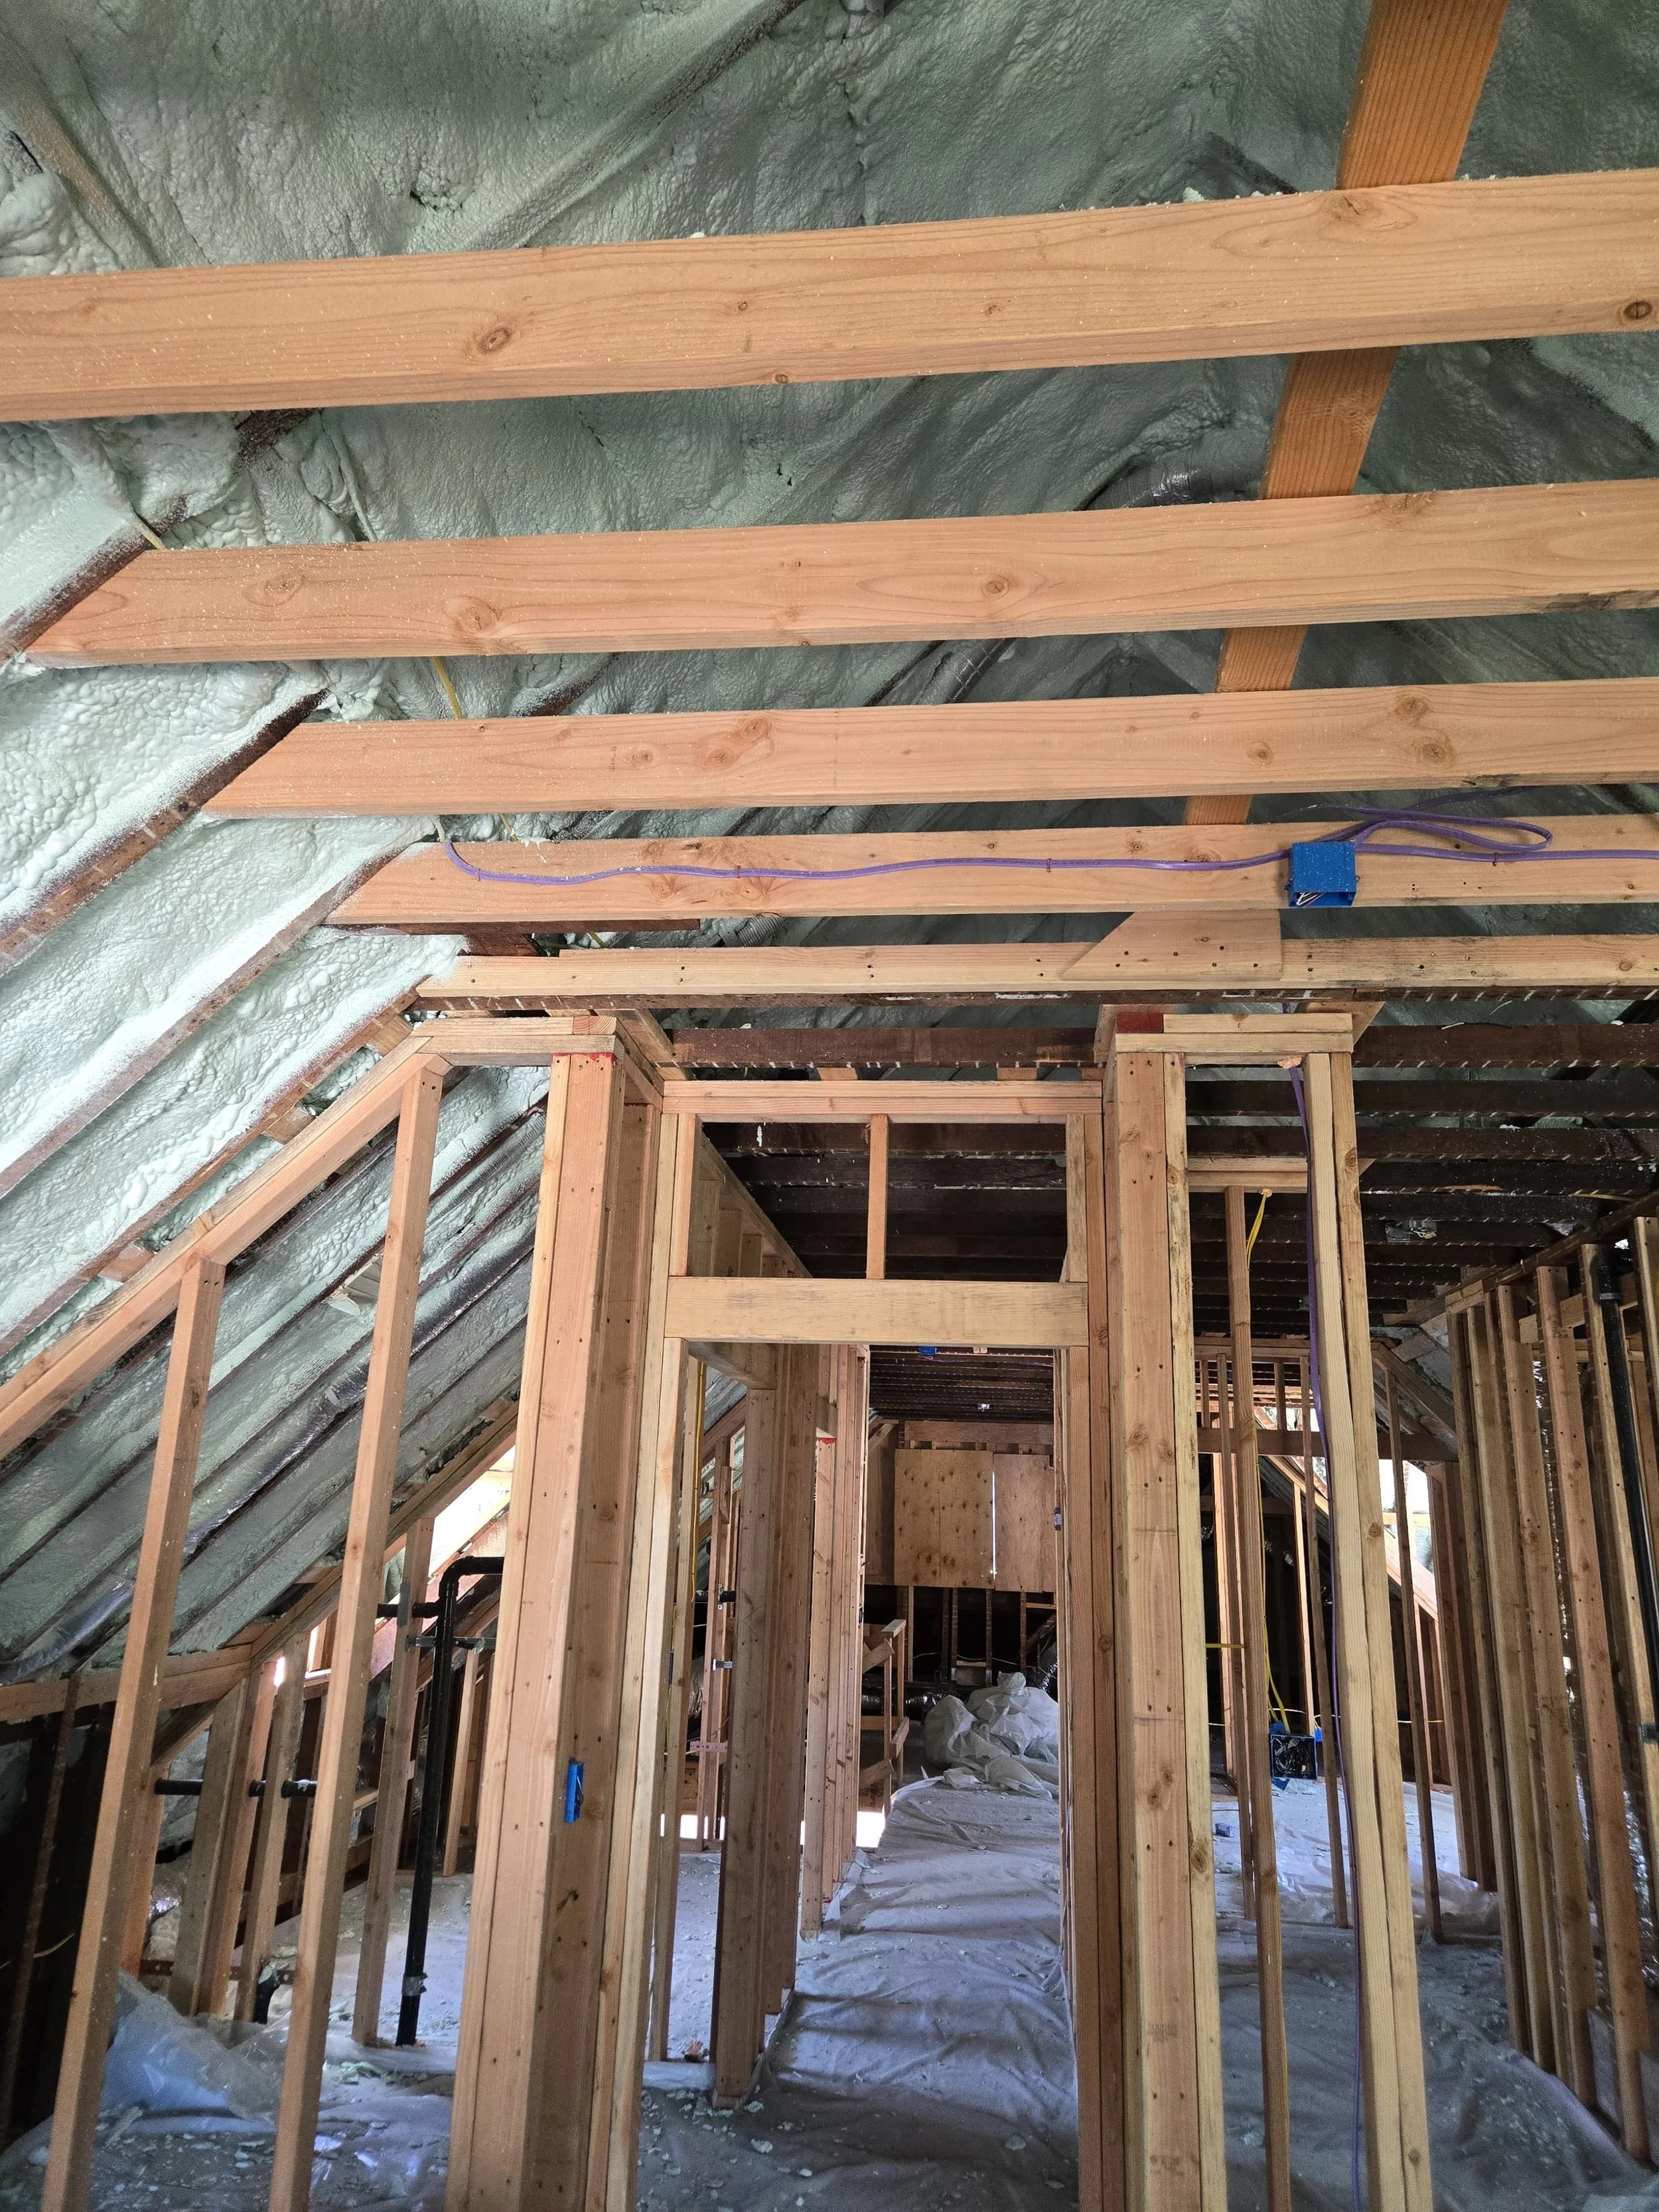
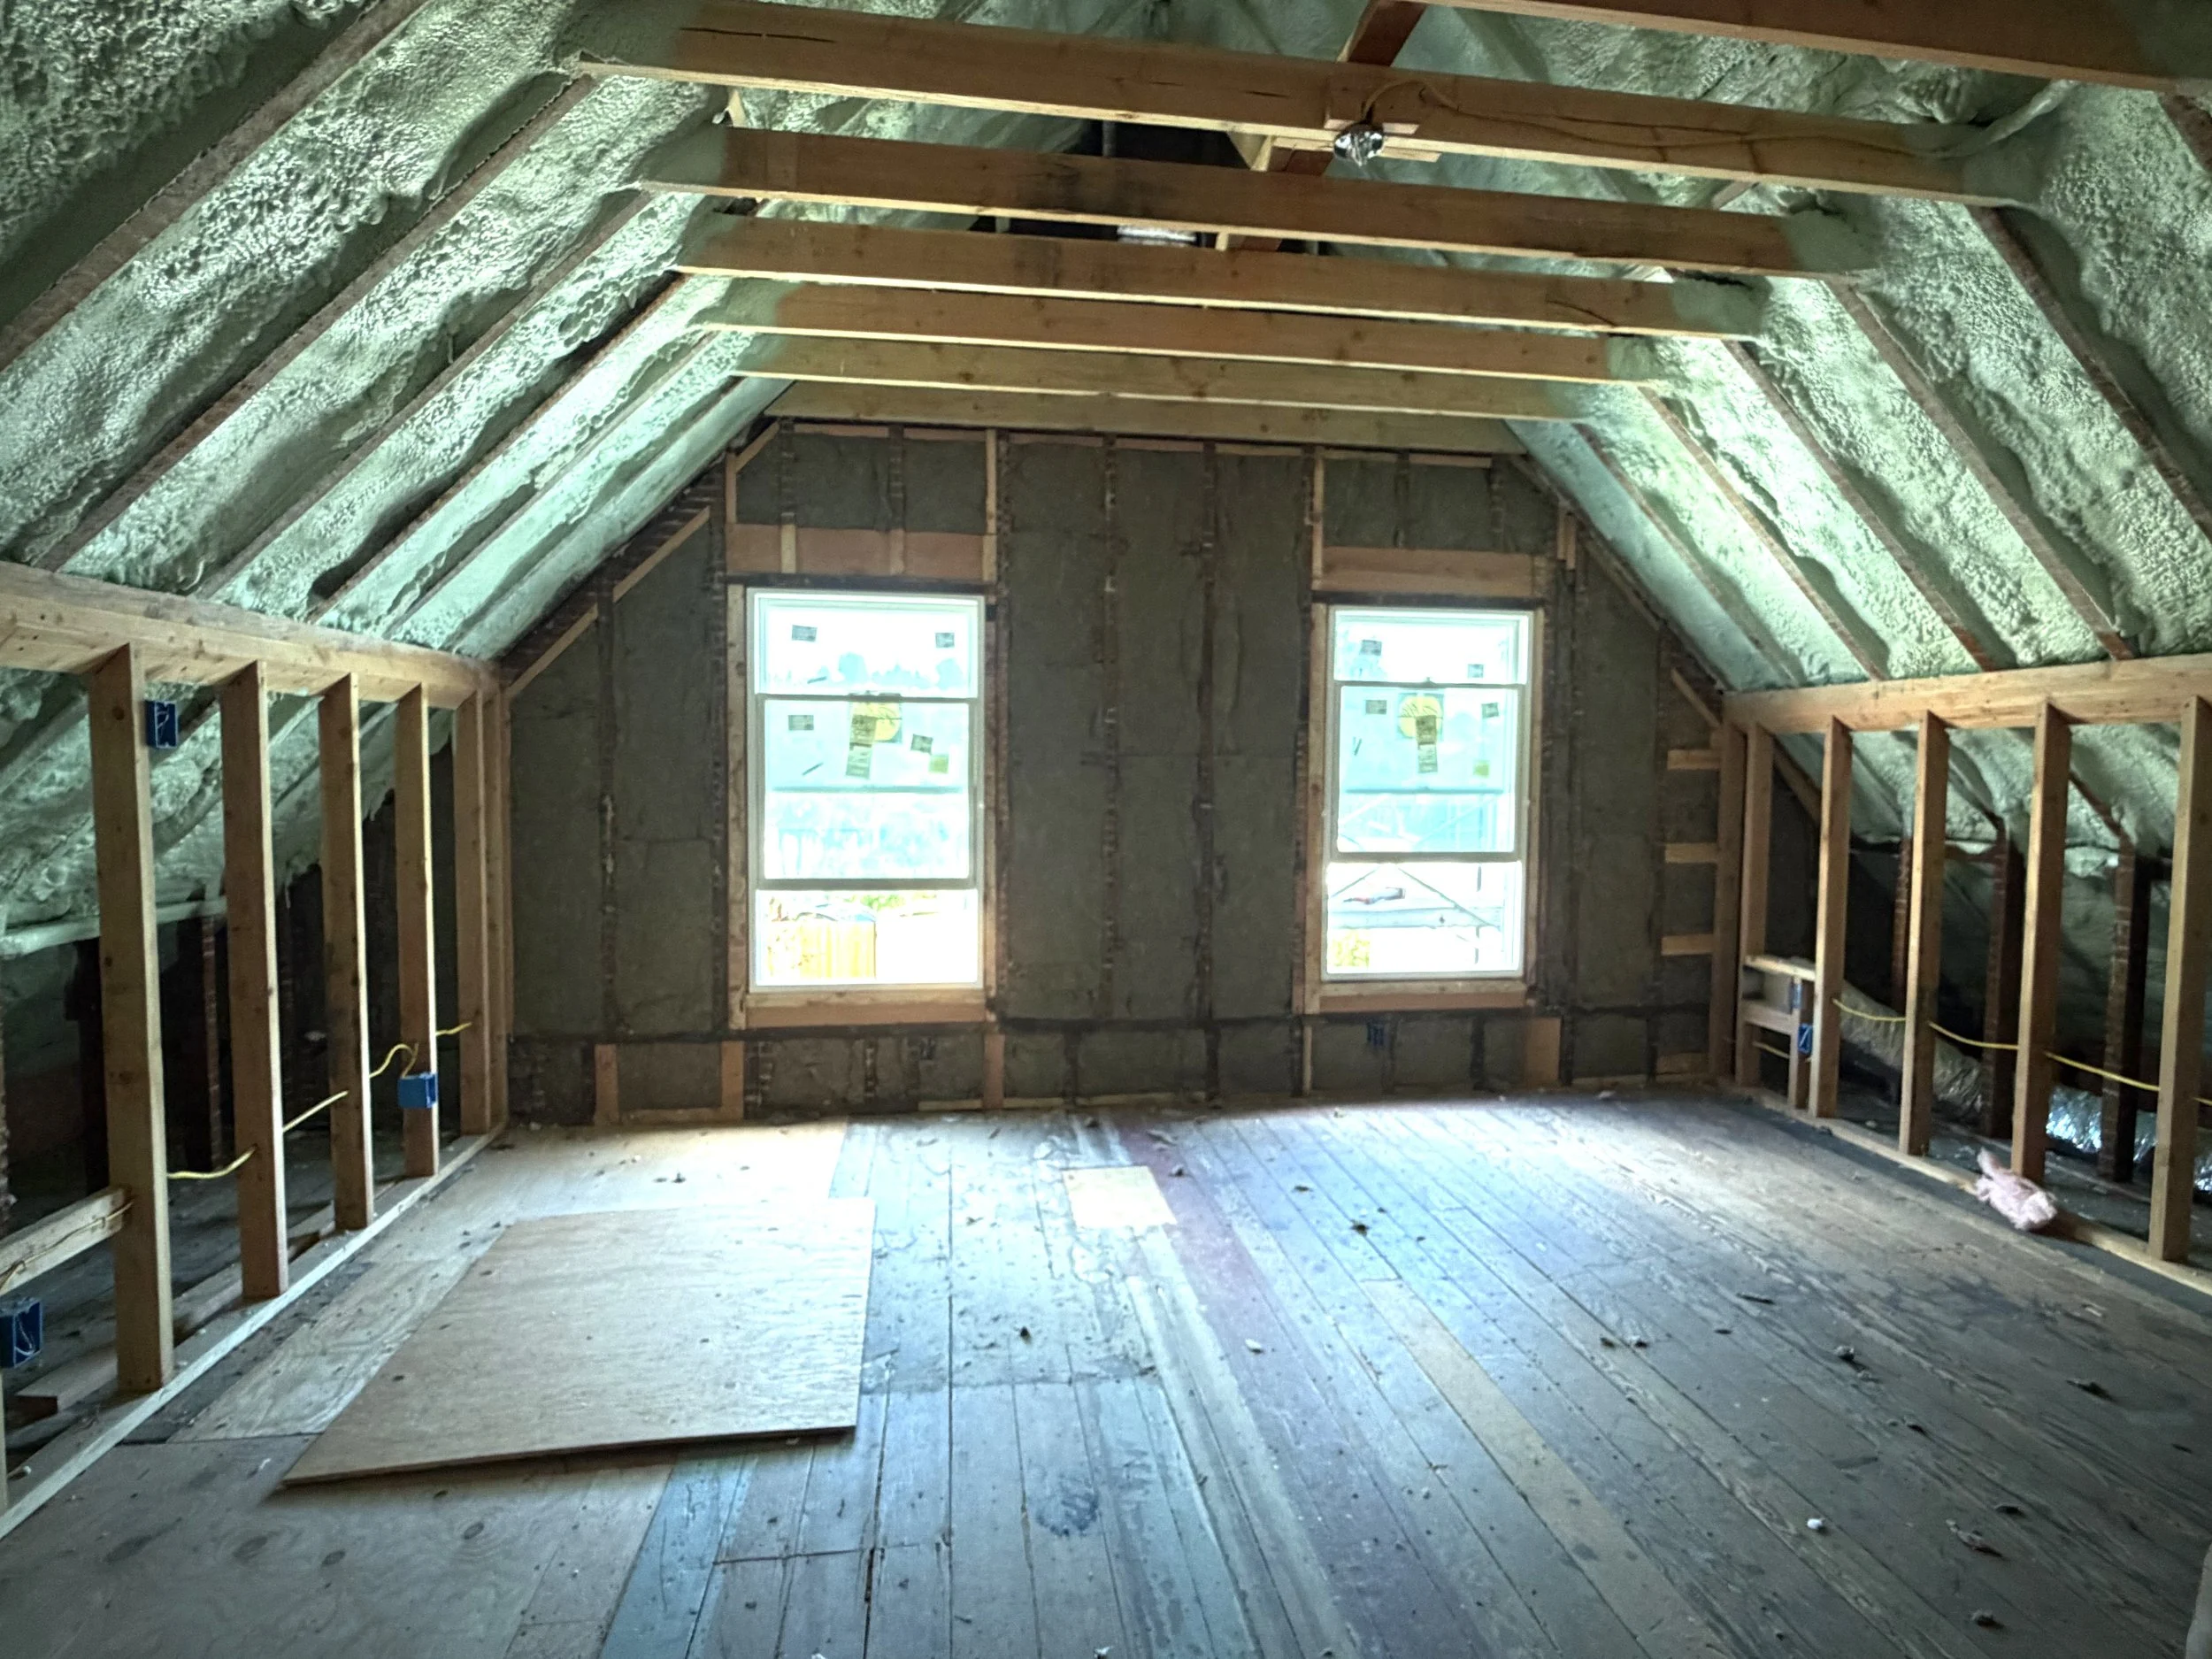
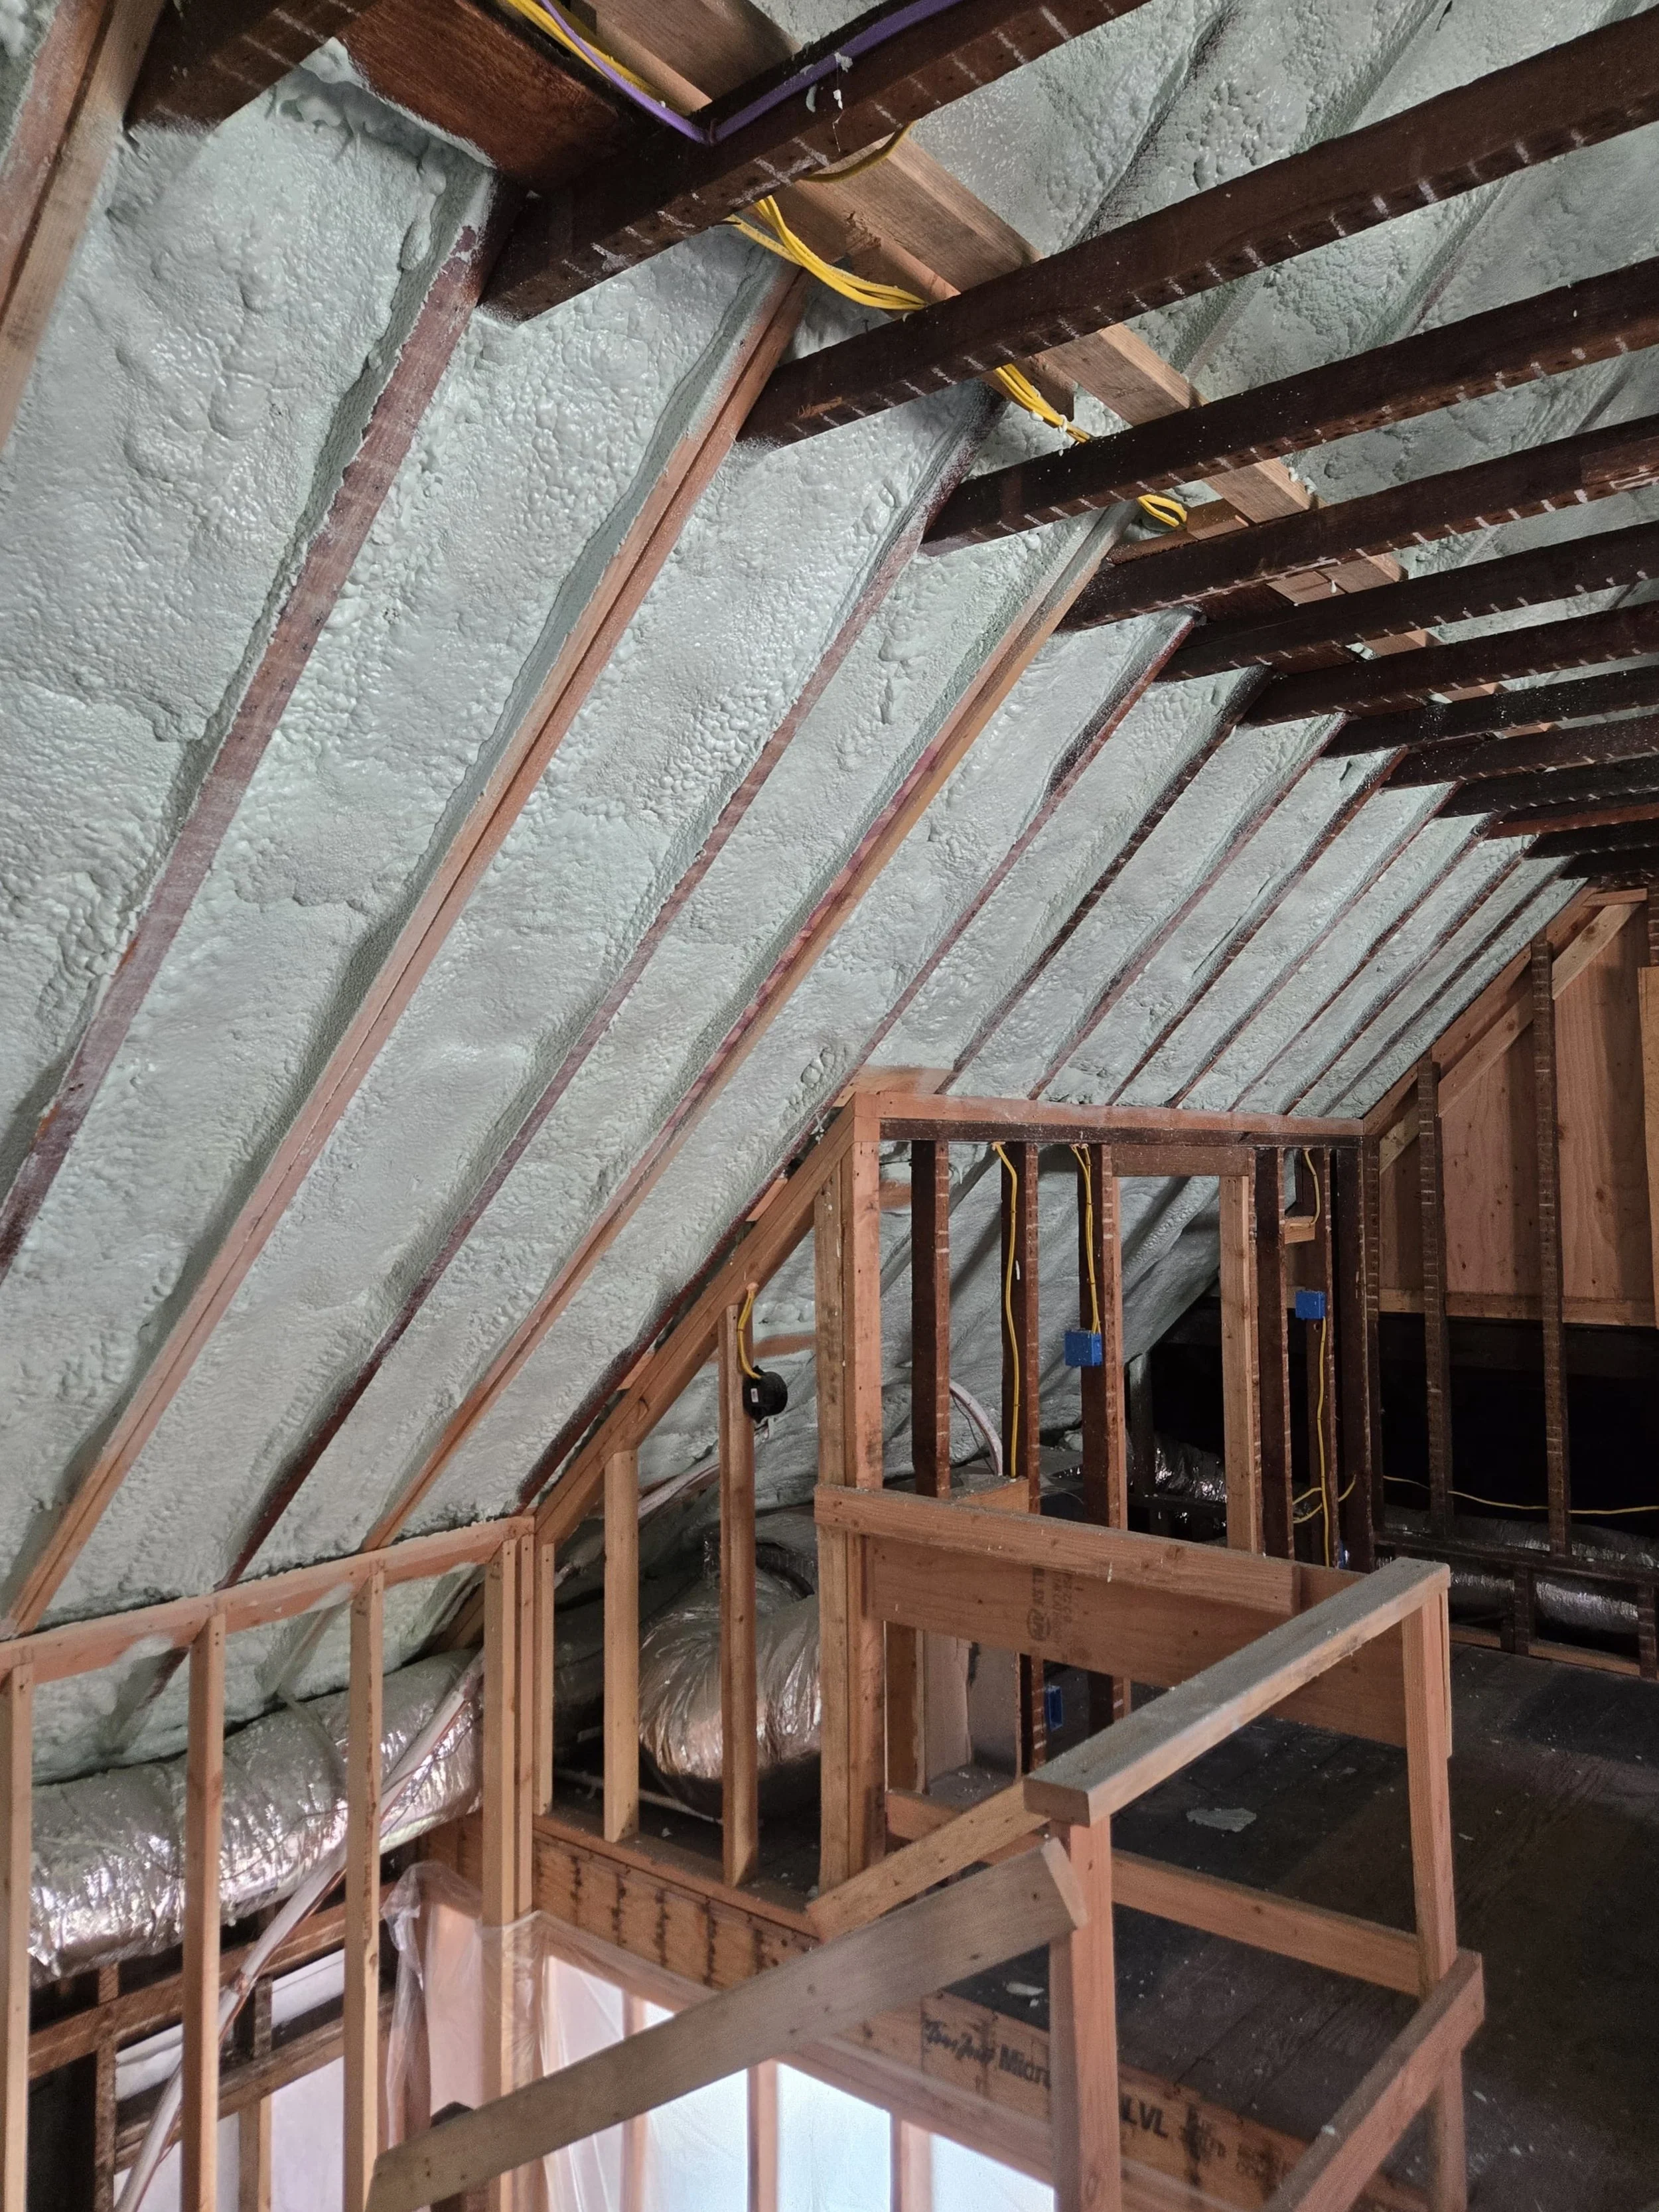
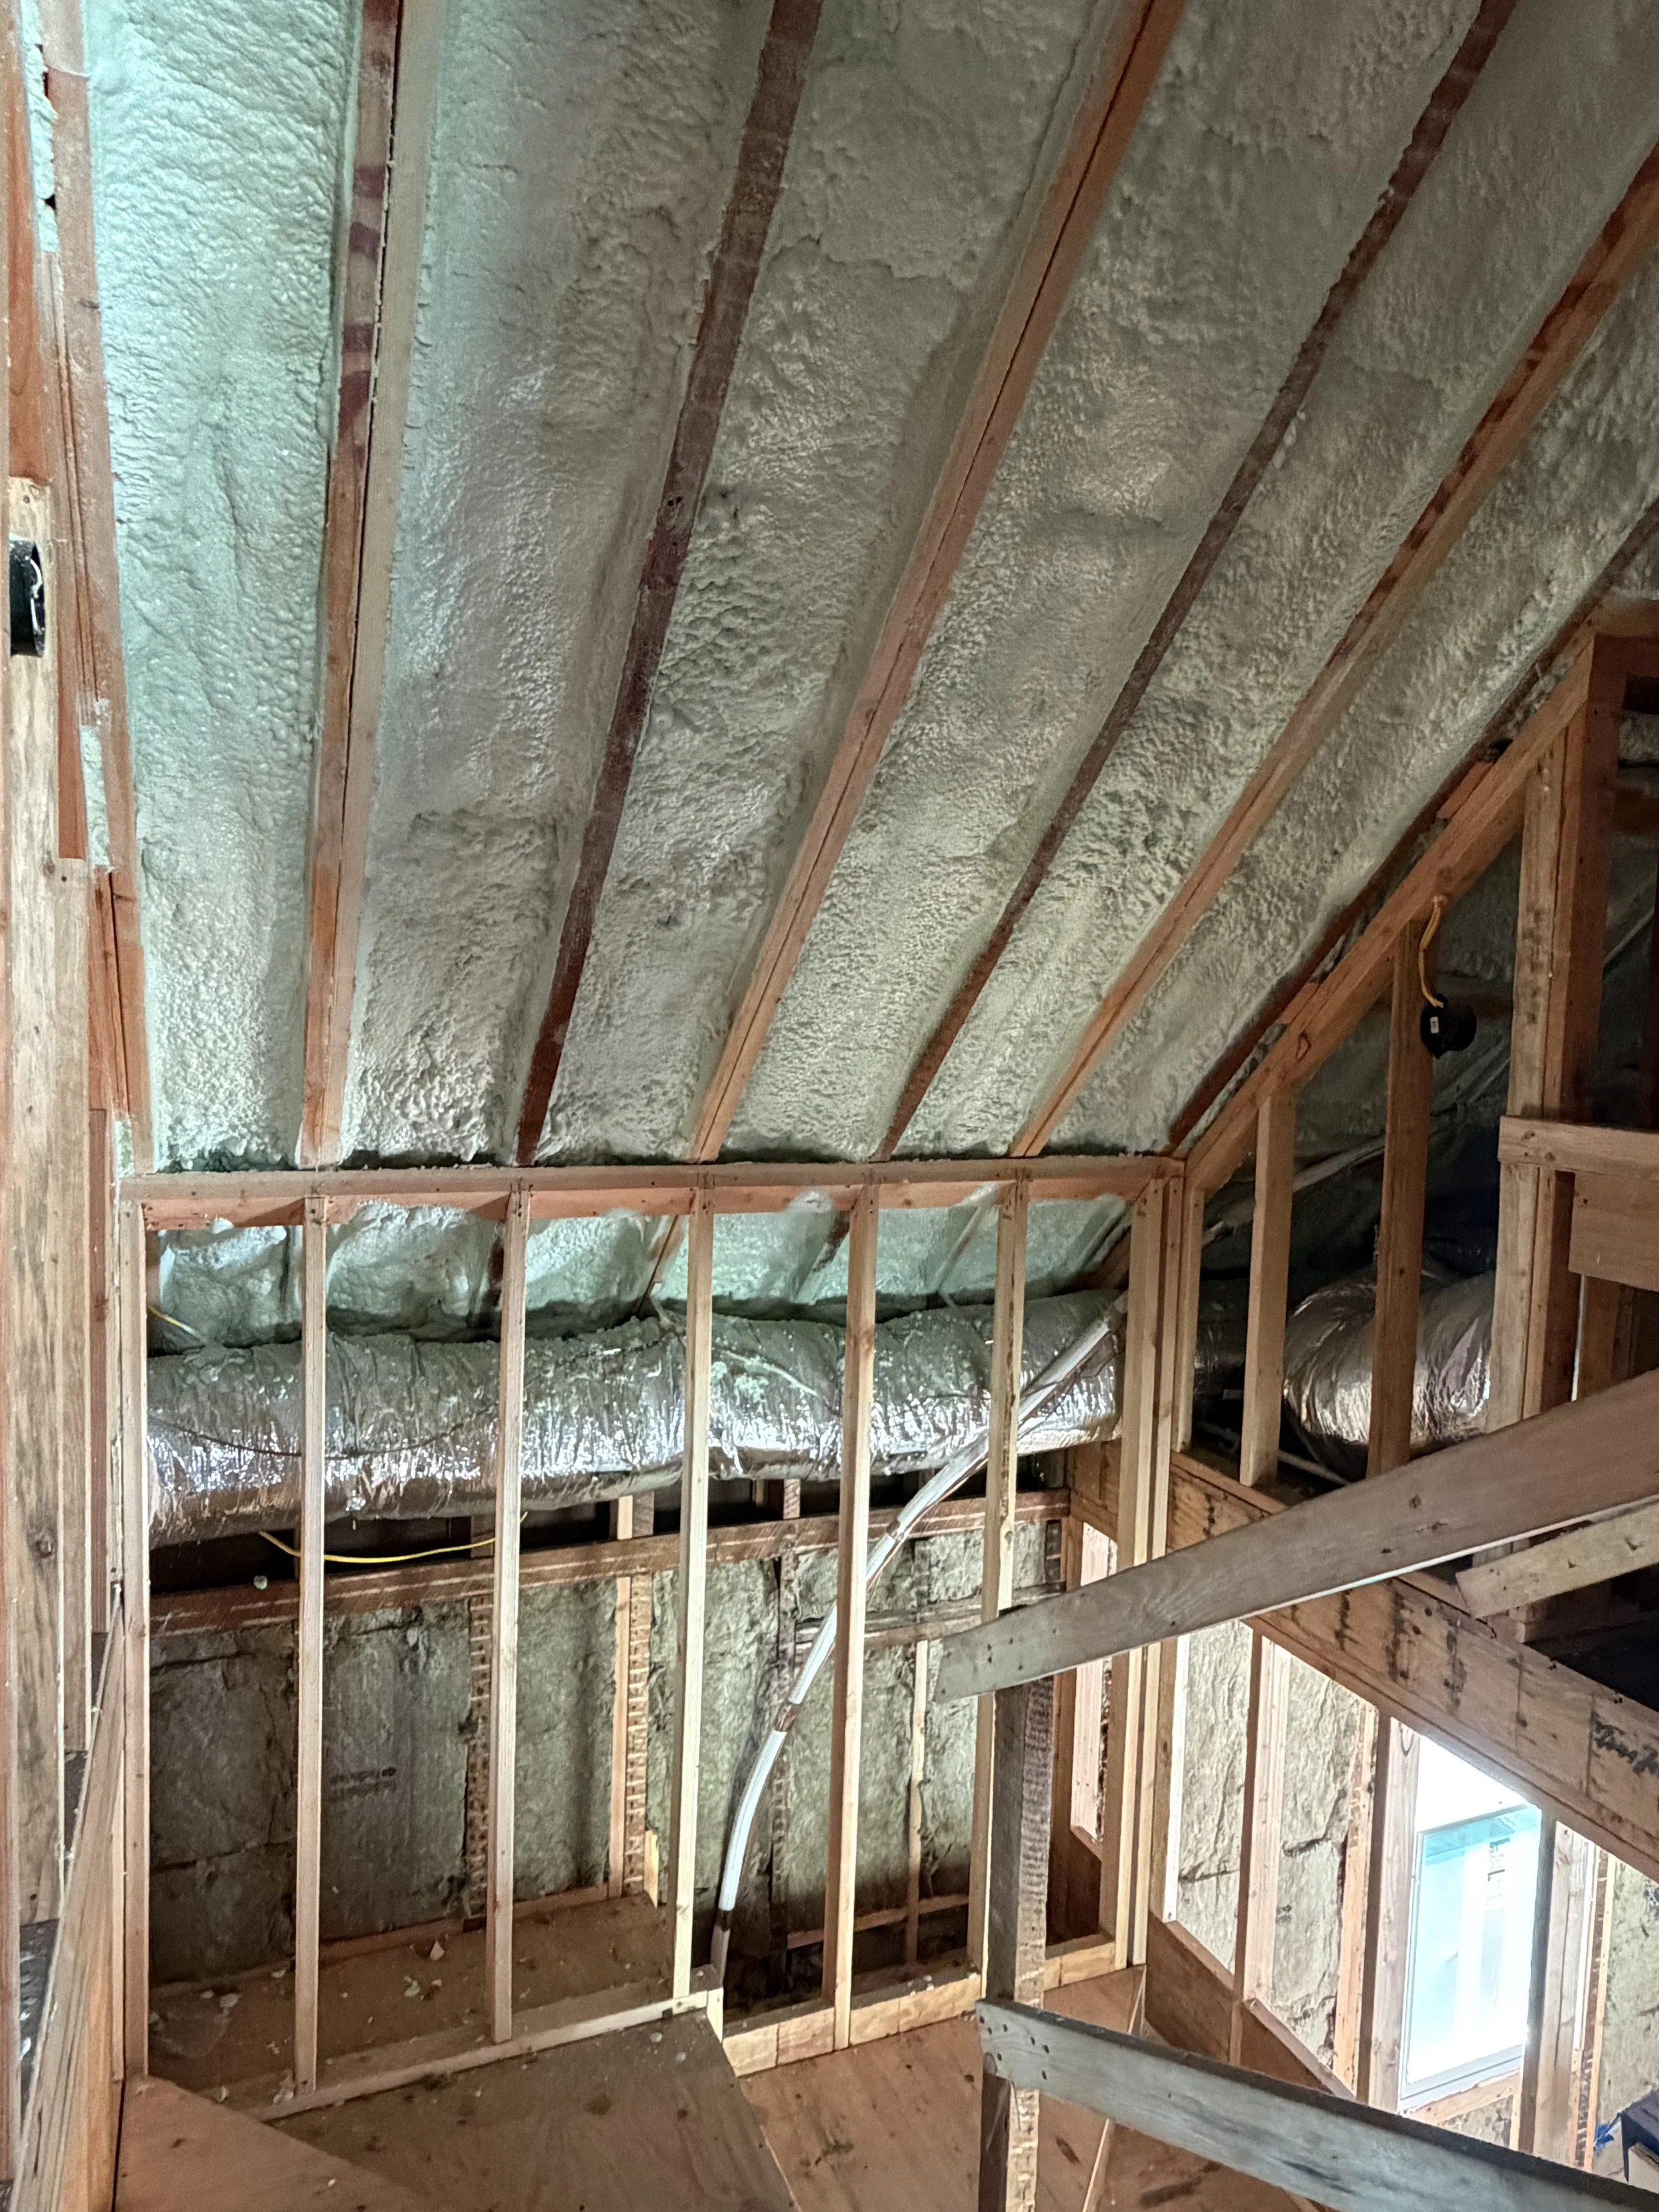
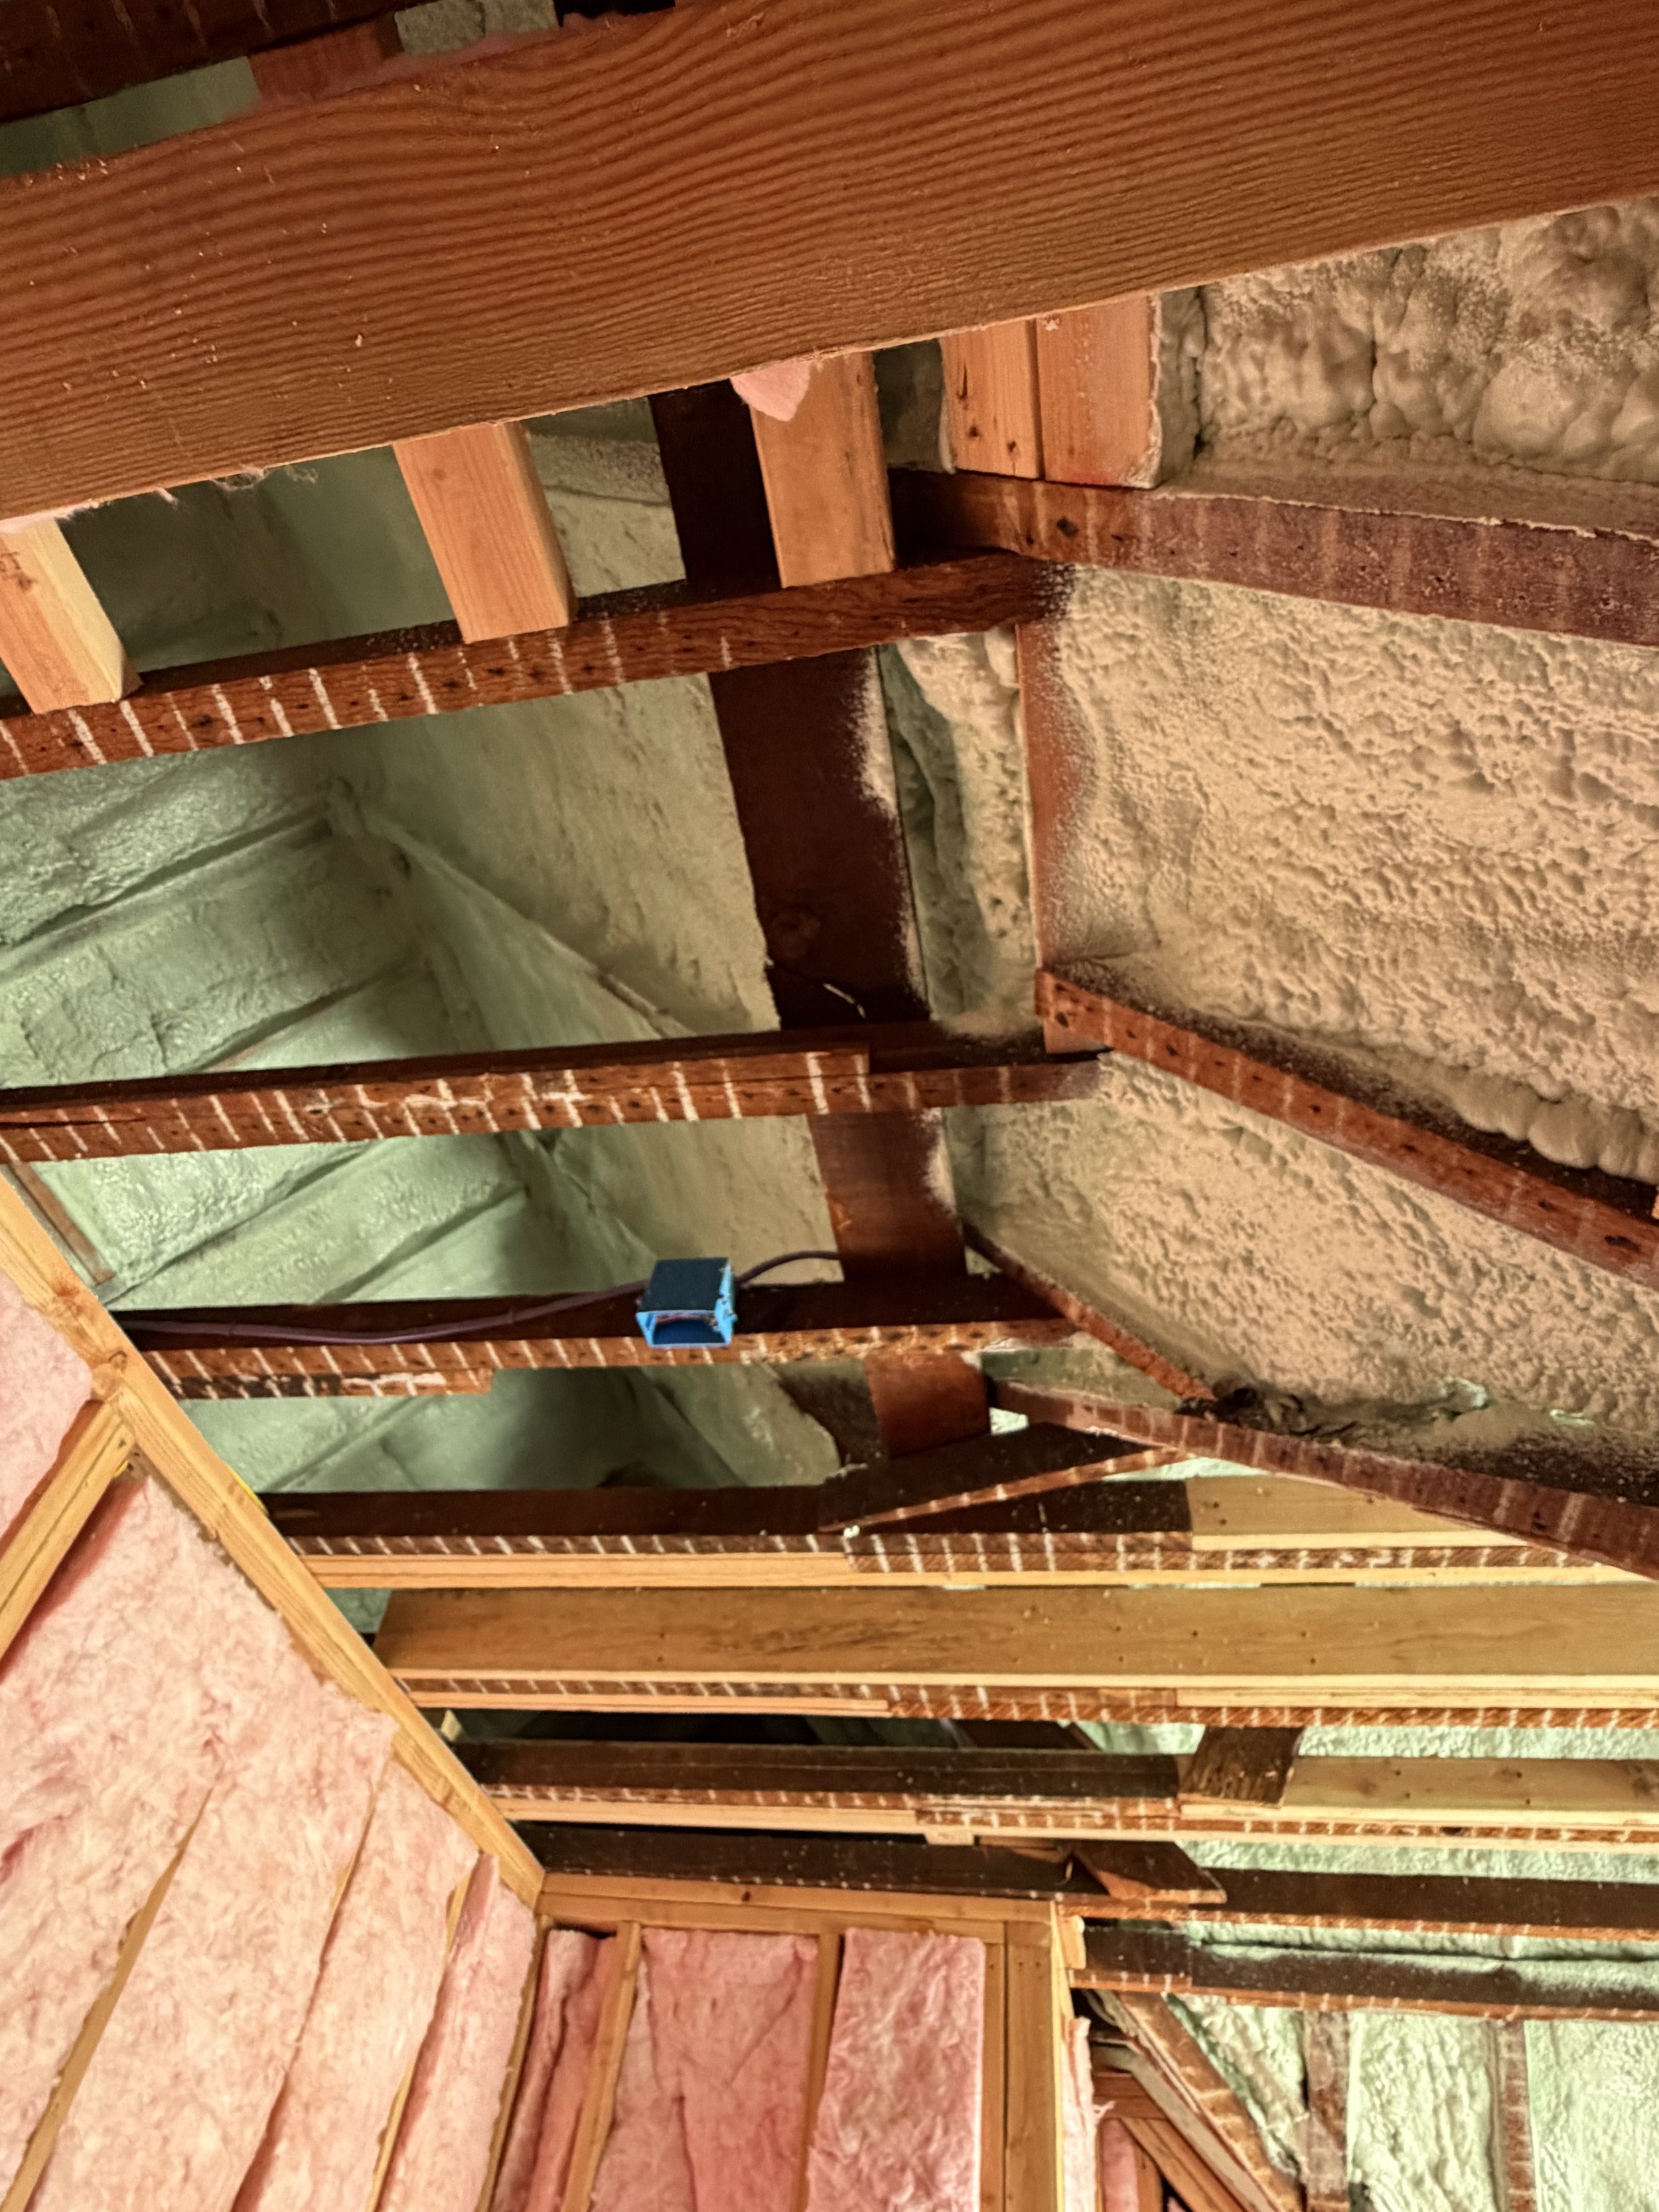
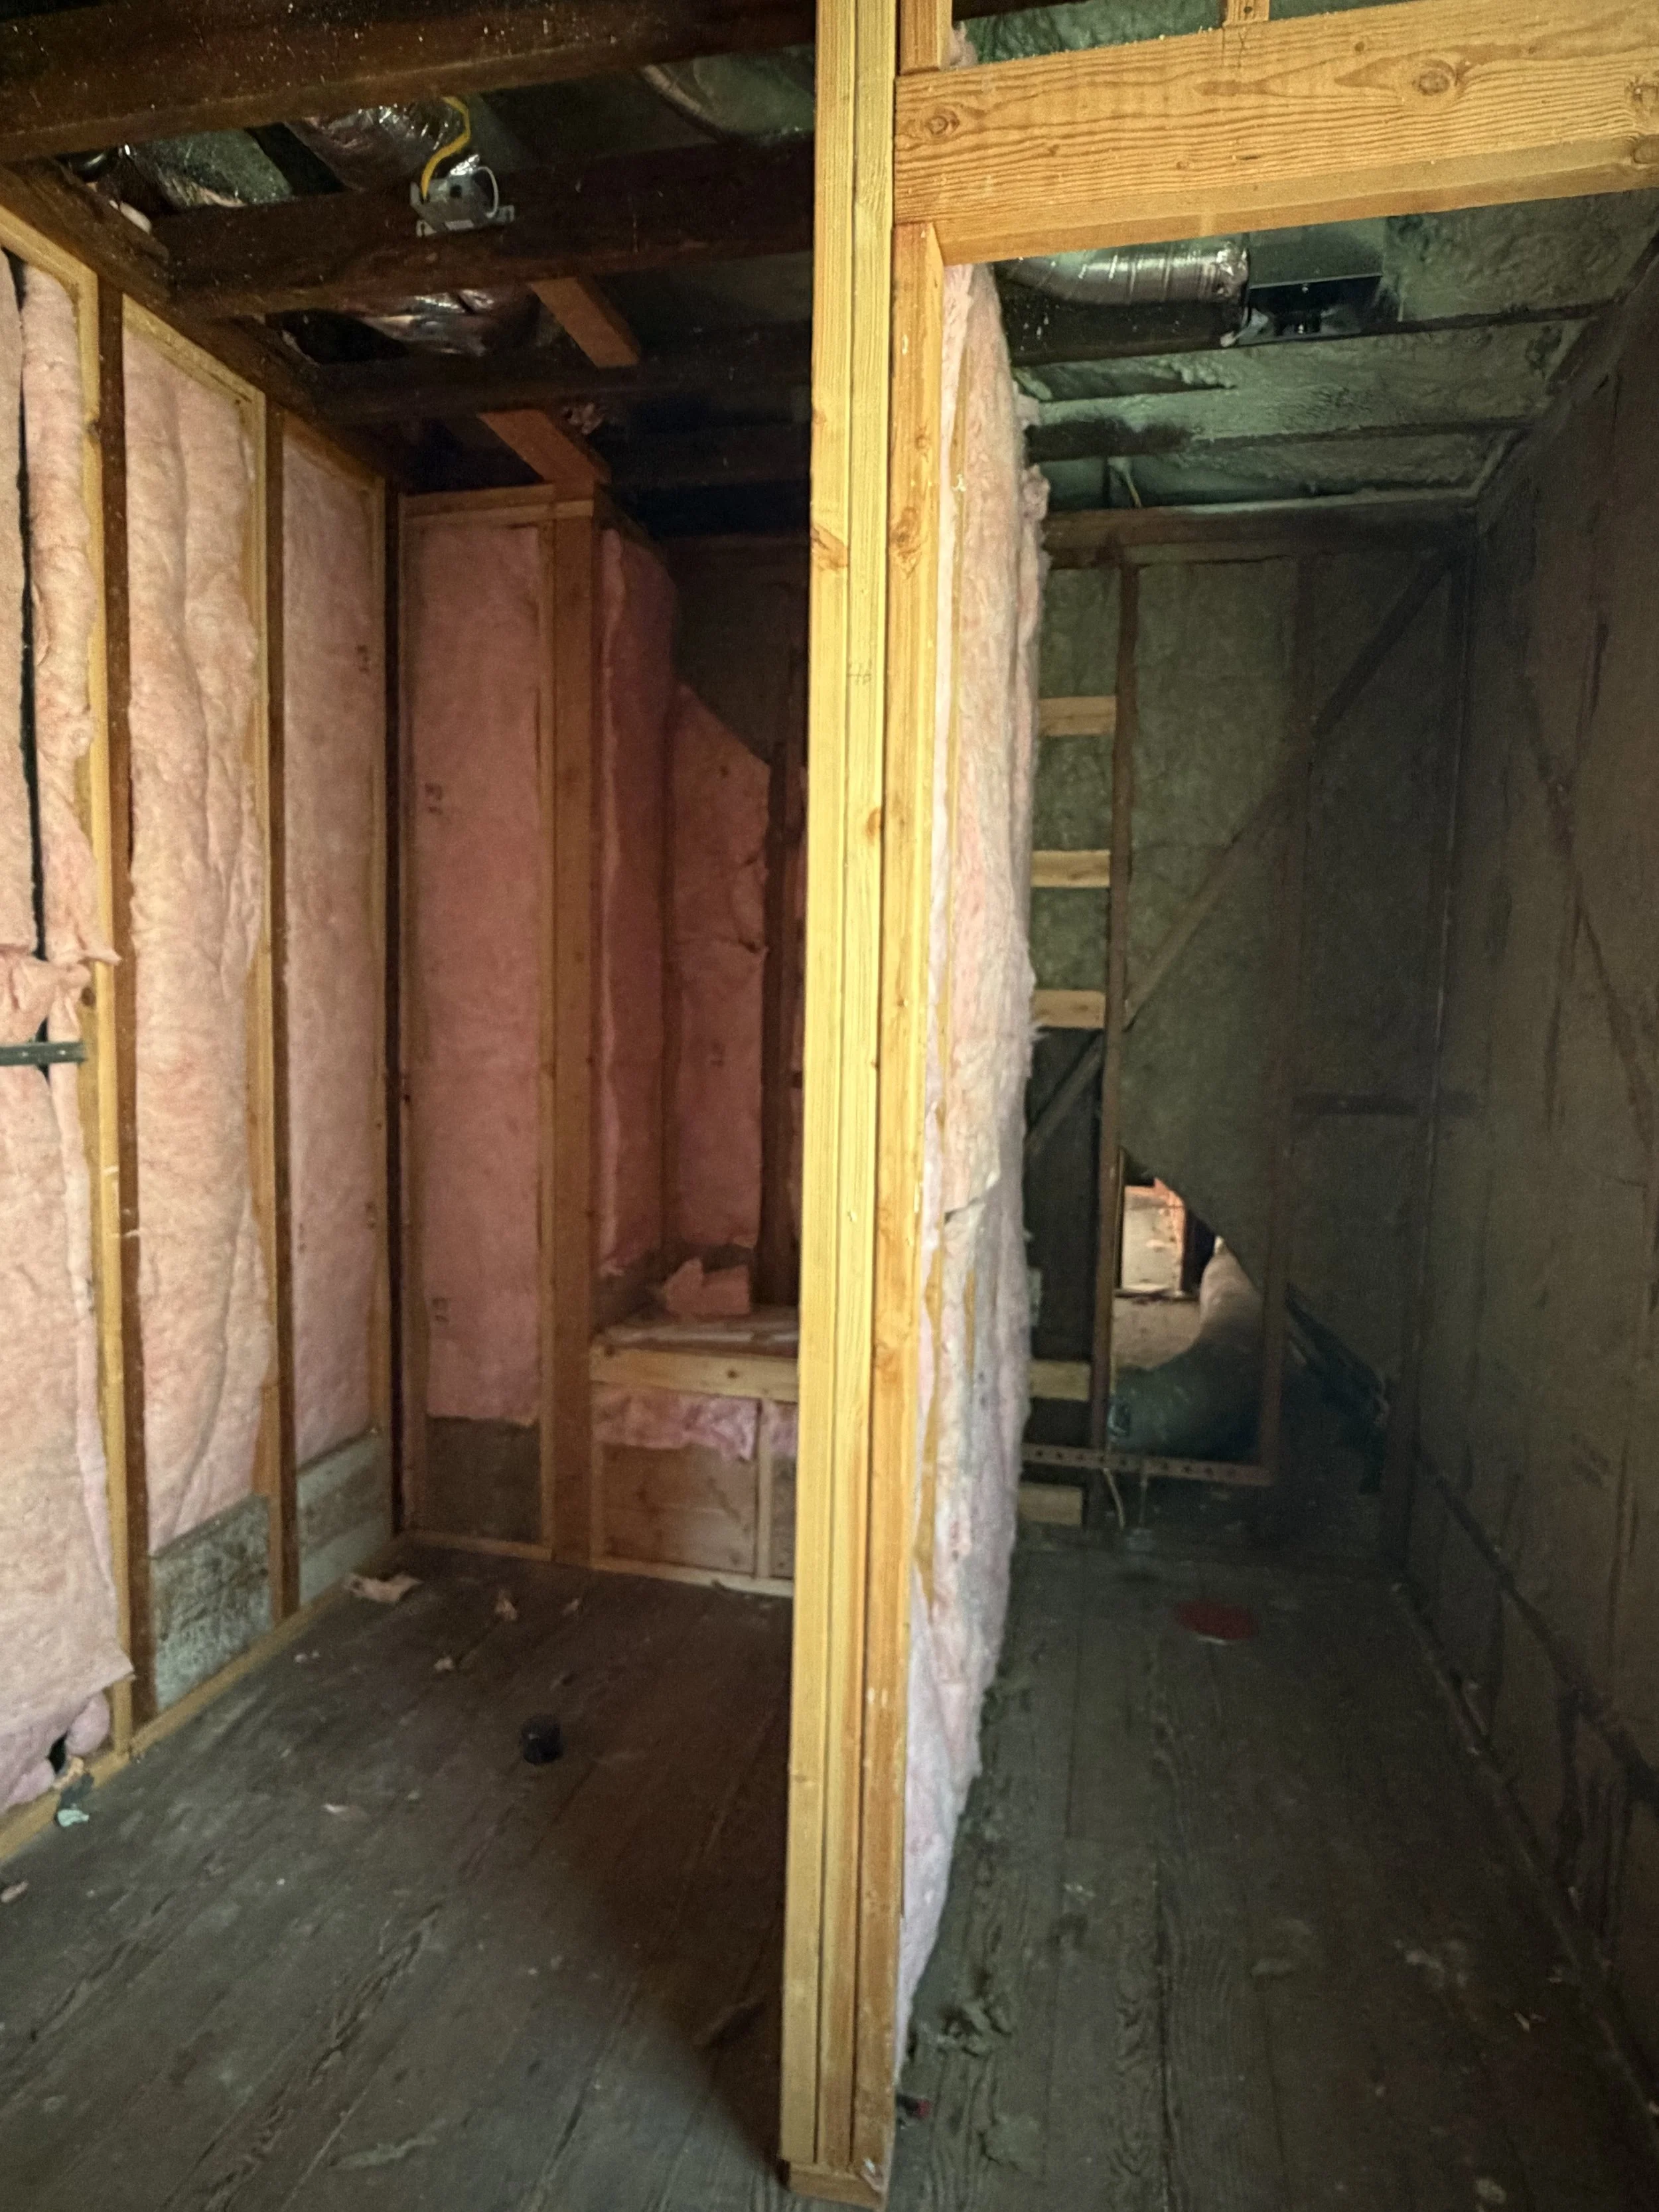
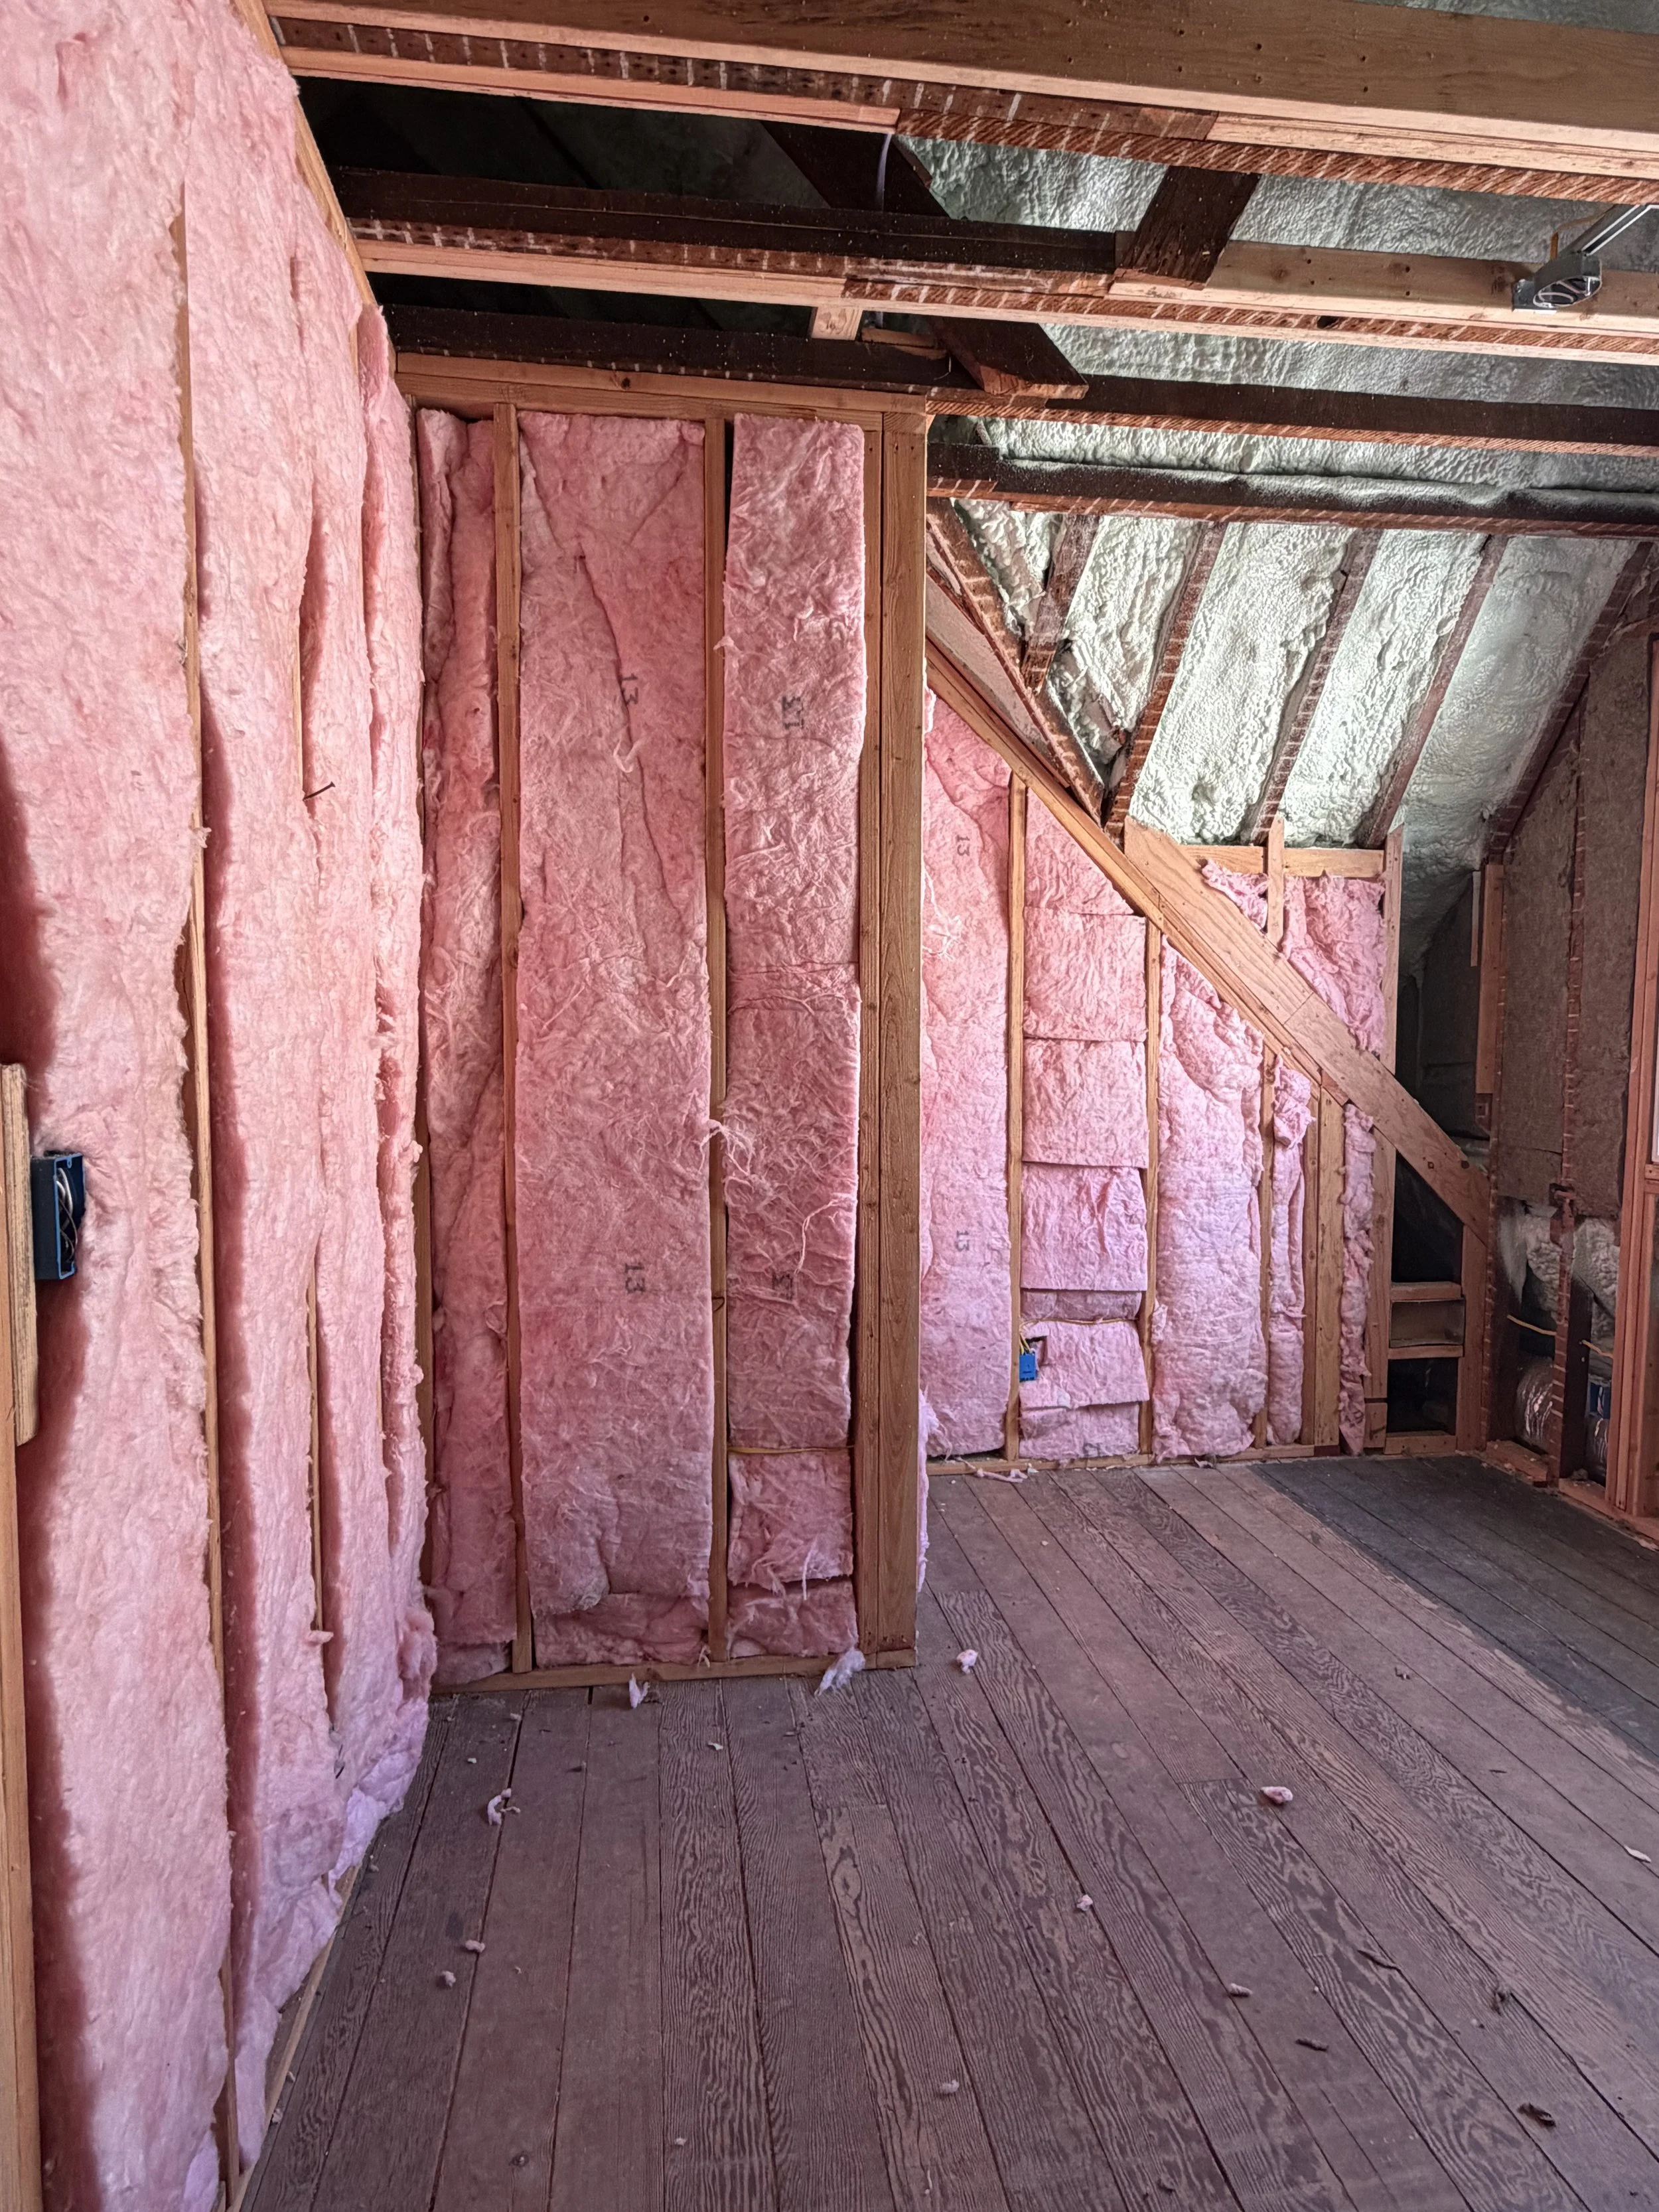
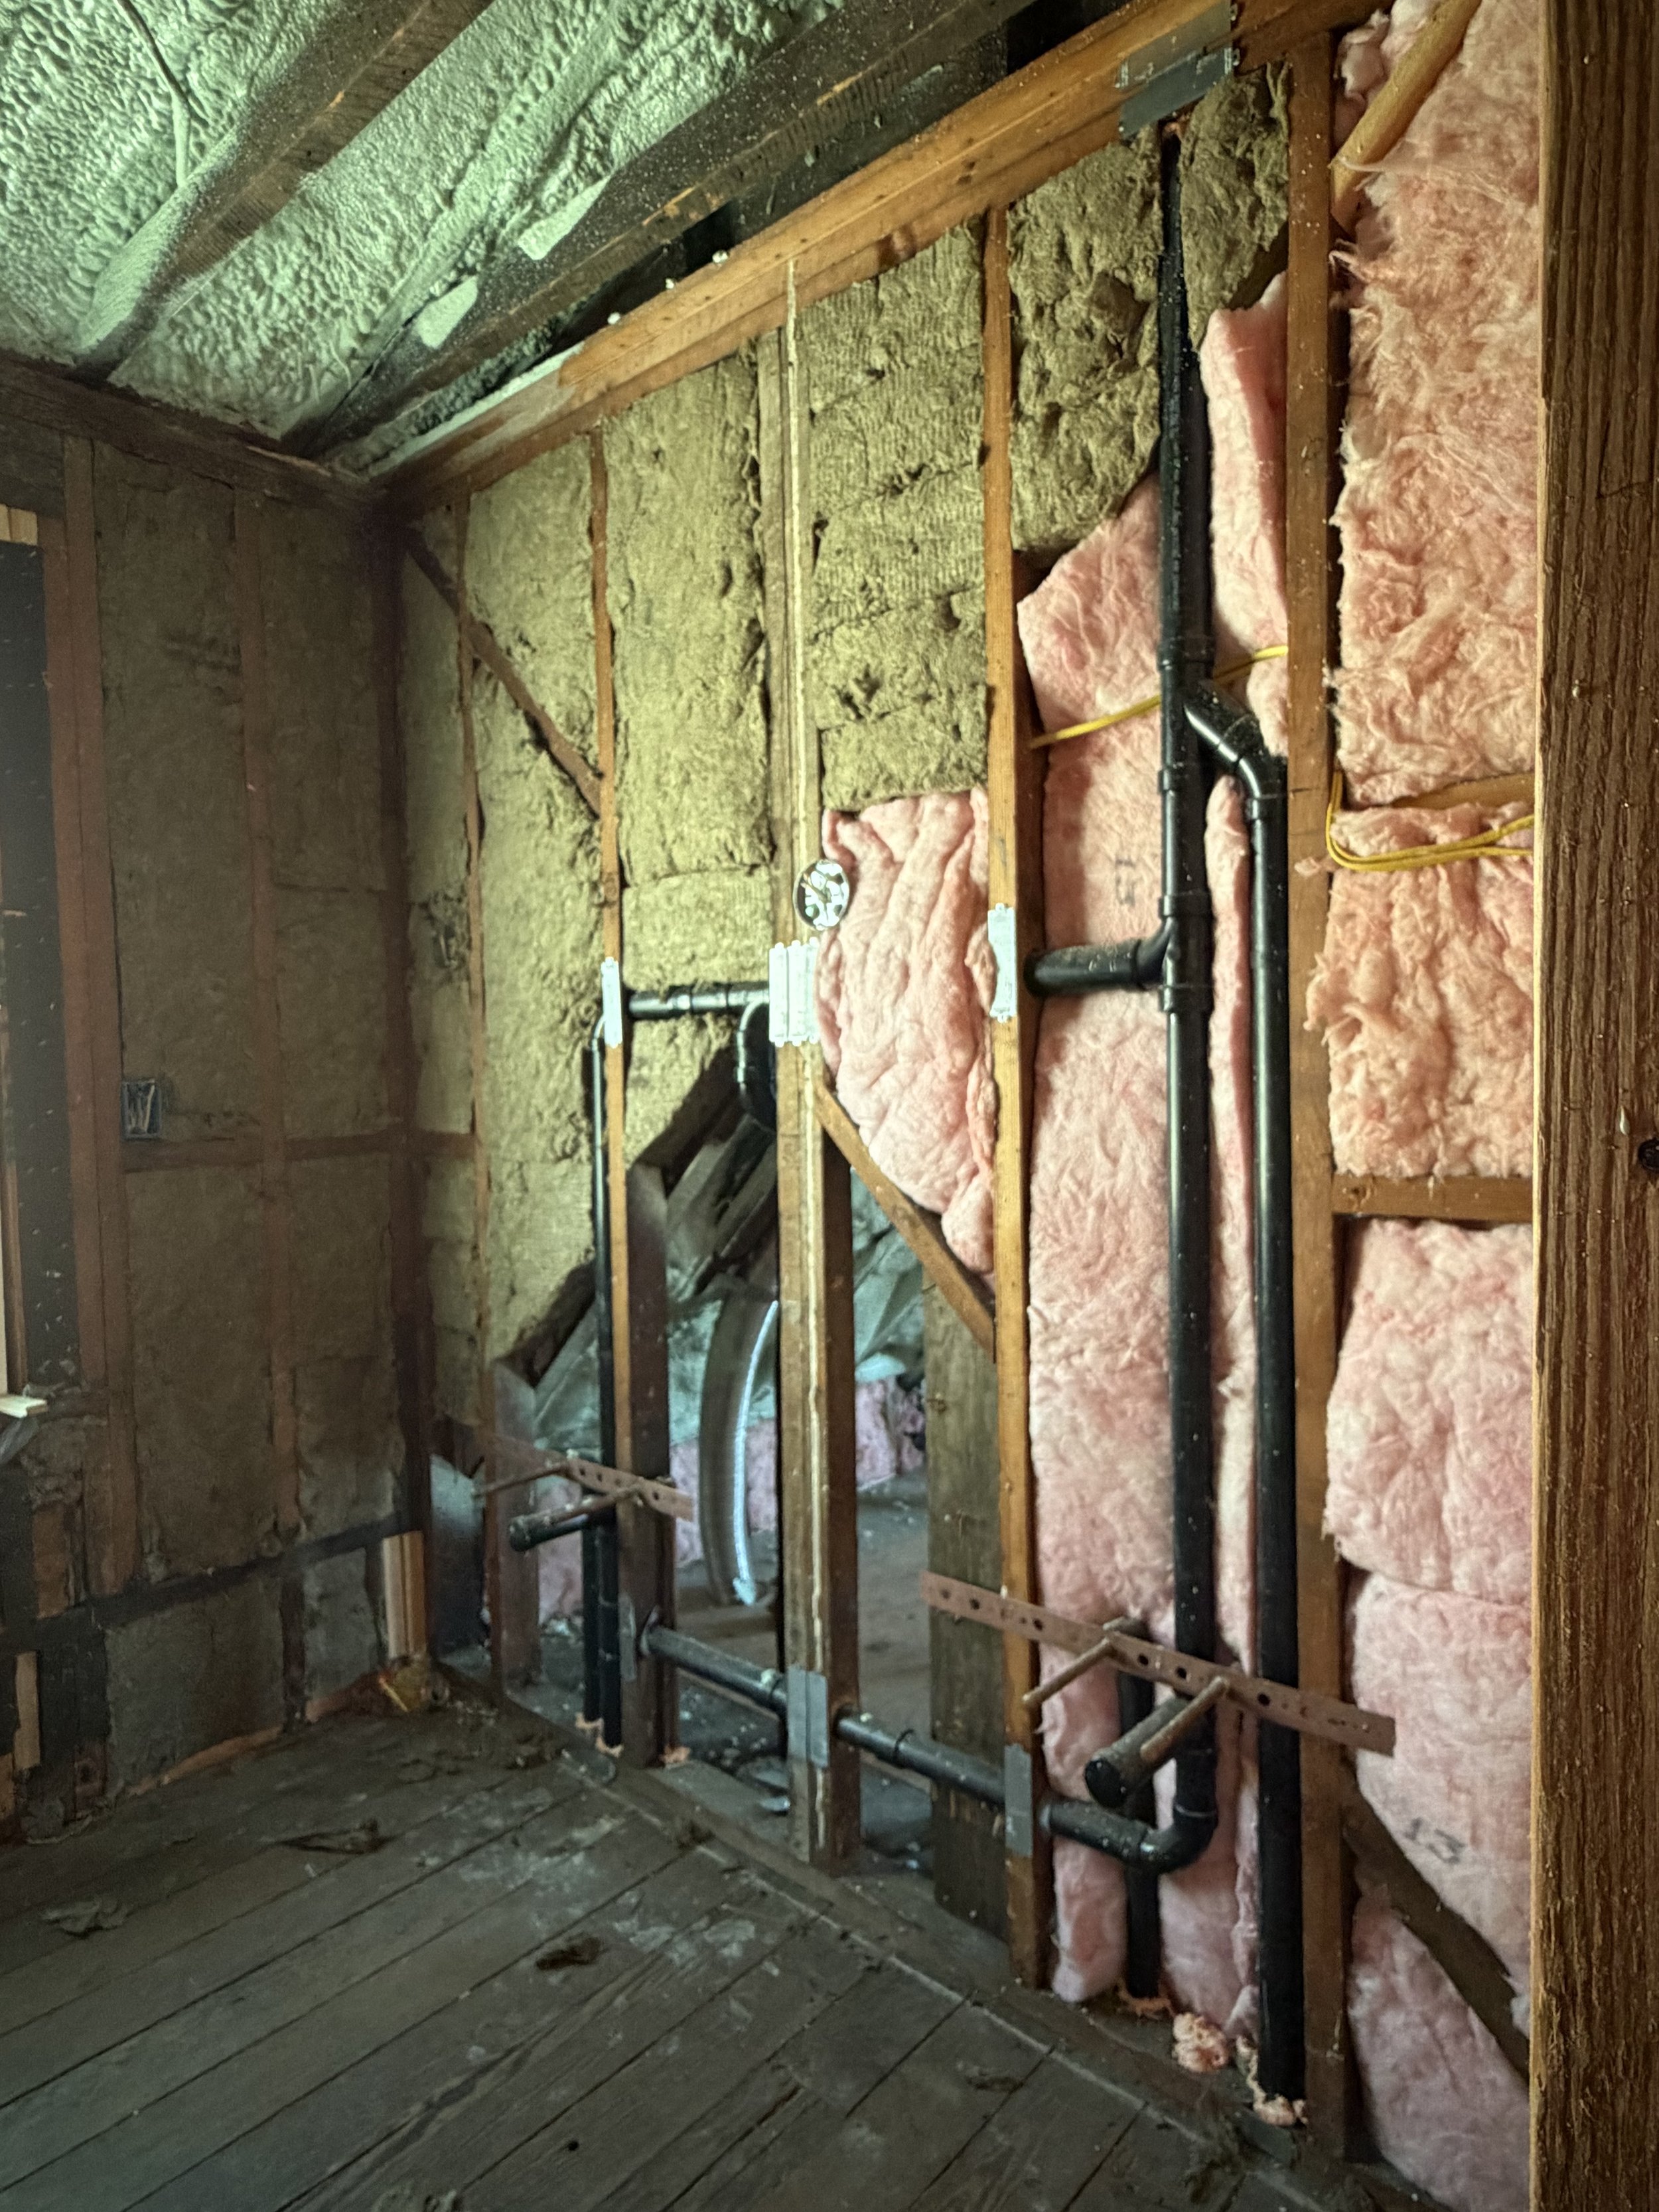
Rather than treating the entire house with one insulation product, different materials were used where they were best suited. Closed-cell spray foam became part of the solution in areas where its properties and ability to conform to irregular spaces made sense, particularly around portions of the roofline and more complicated framing. Other cavities were filled with batt insulation, while mineral wool was used in appropriate areas as another layer of thermal and moisture-conscious protection.
By the time installation began, the house looked dramatically different from when our original insulation decisions had been made. And that became important. During the exterior restoration, approximately 70 percent of the siding had been replaced. As that work progressed, access and conditions changed. What had seemed like an unusually complex insulation problem at the beginning of the project was no longer quite the same problem by the time we actually needed to solve it.
The house had changed. And there were now more straightforward ways to accomplish some of what we had originally anticipated would require a much more complicated process. Unfortunately, our pricing had been established much earlier. That became one of the hardest lessons of this phase.
Insulating the Inside, Too
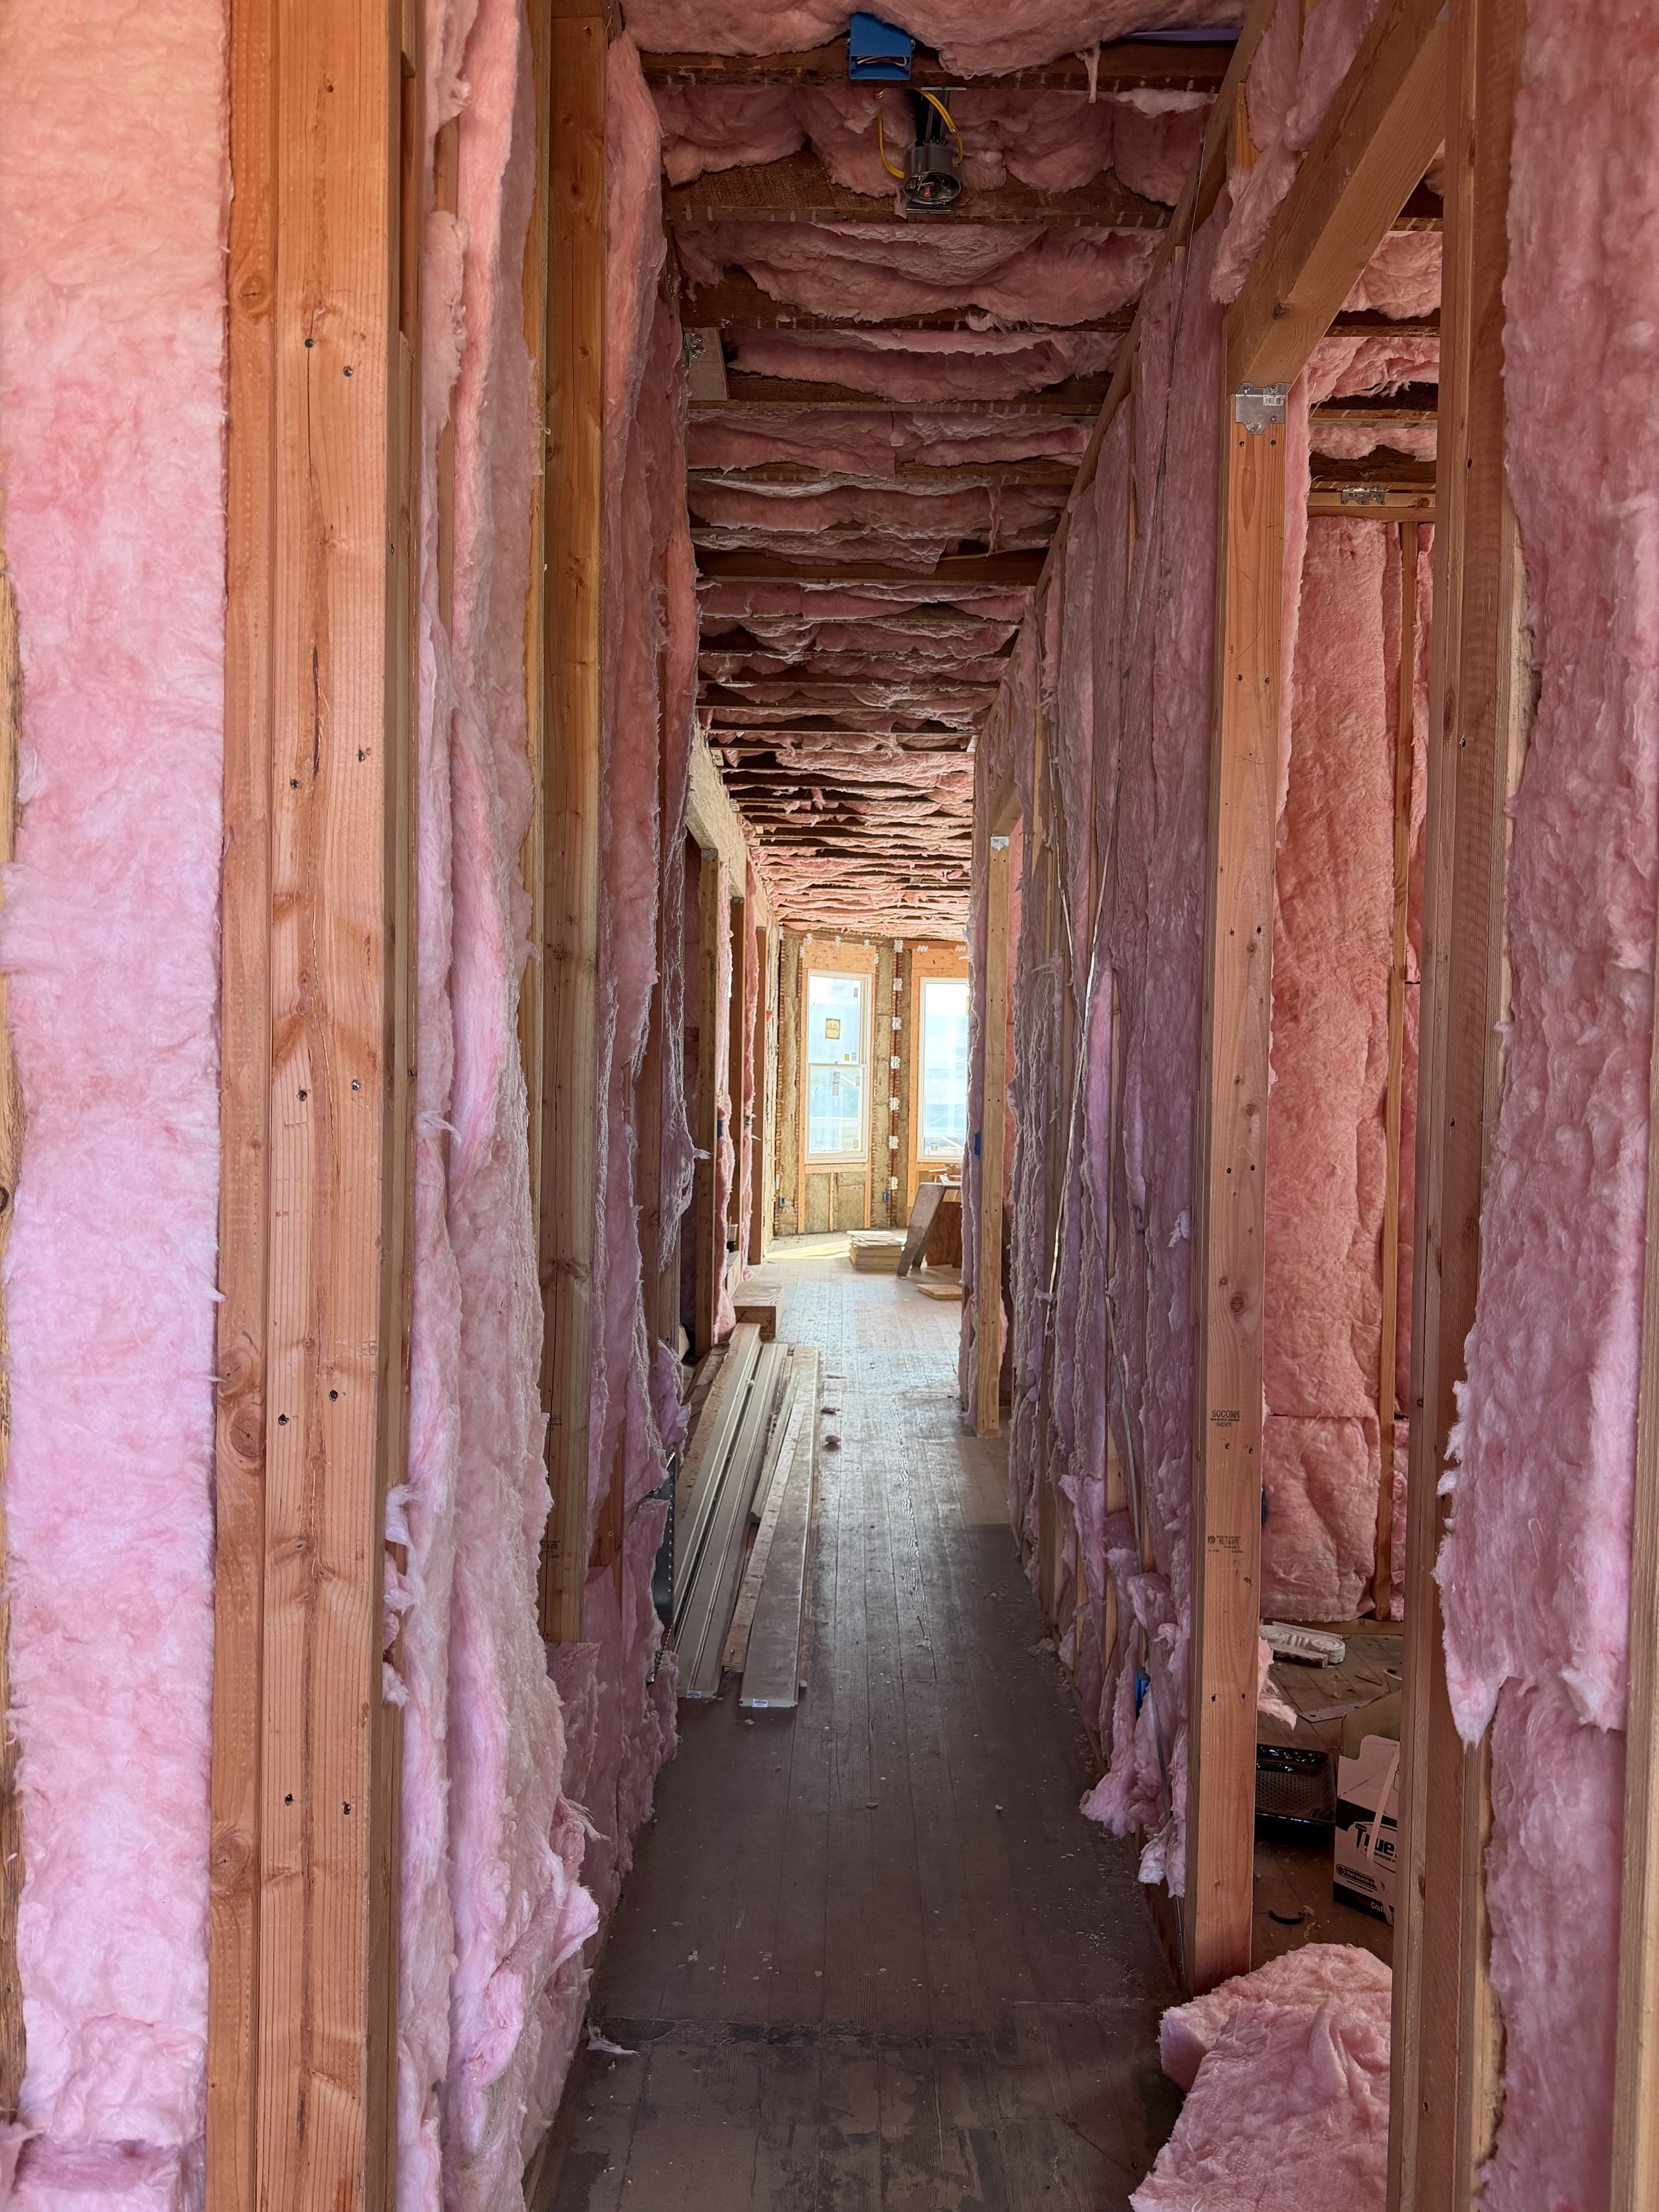
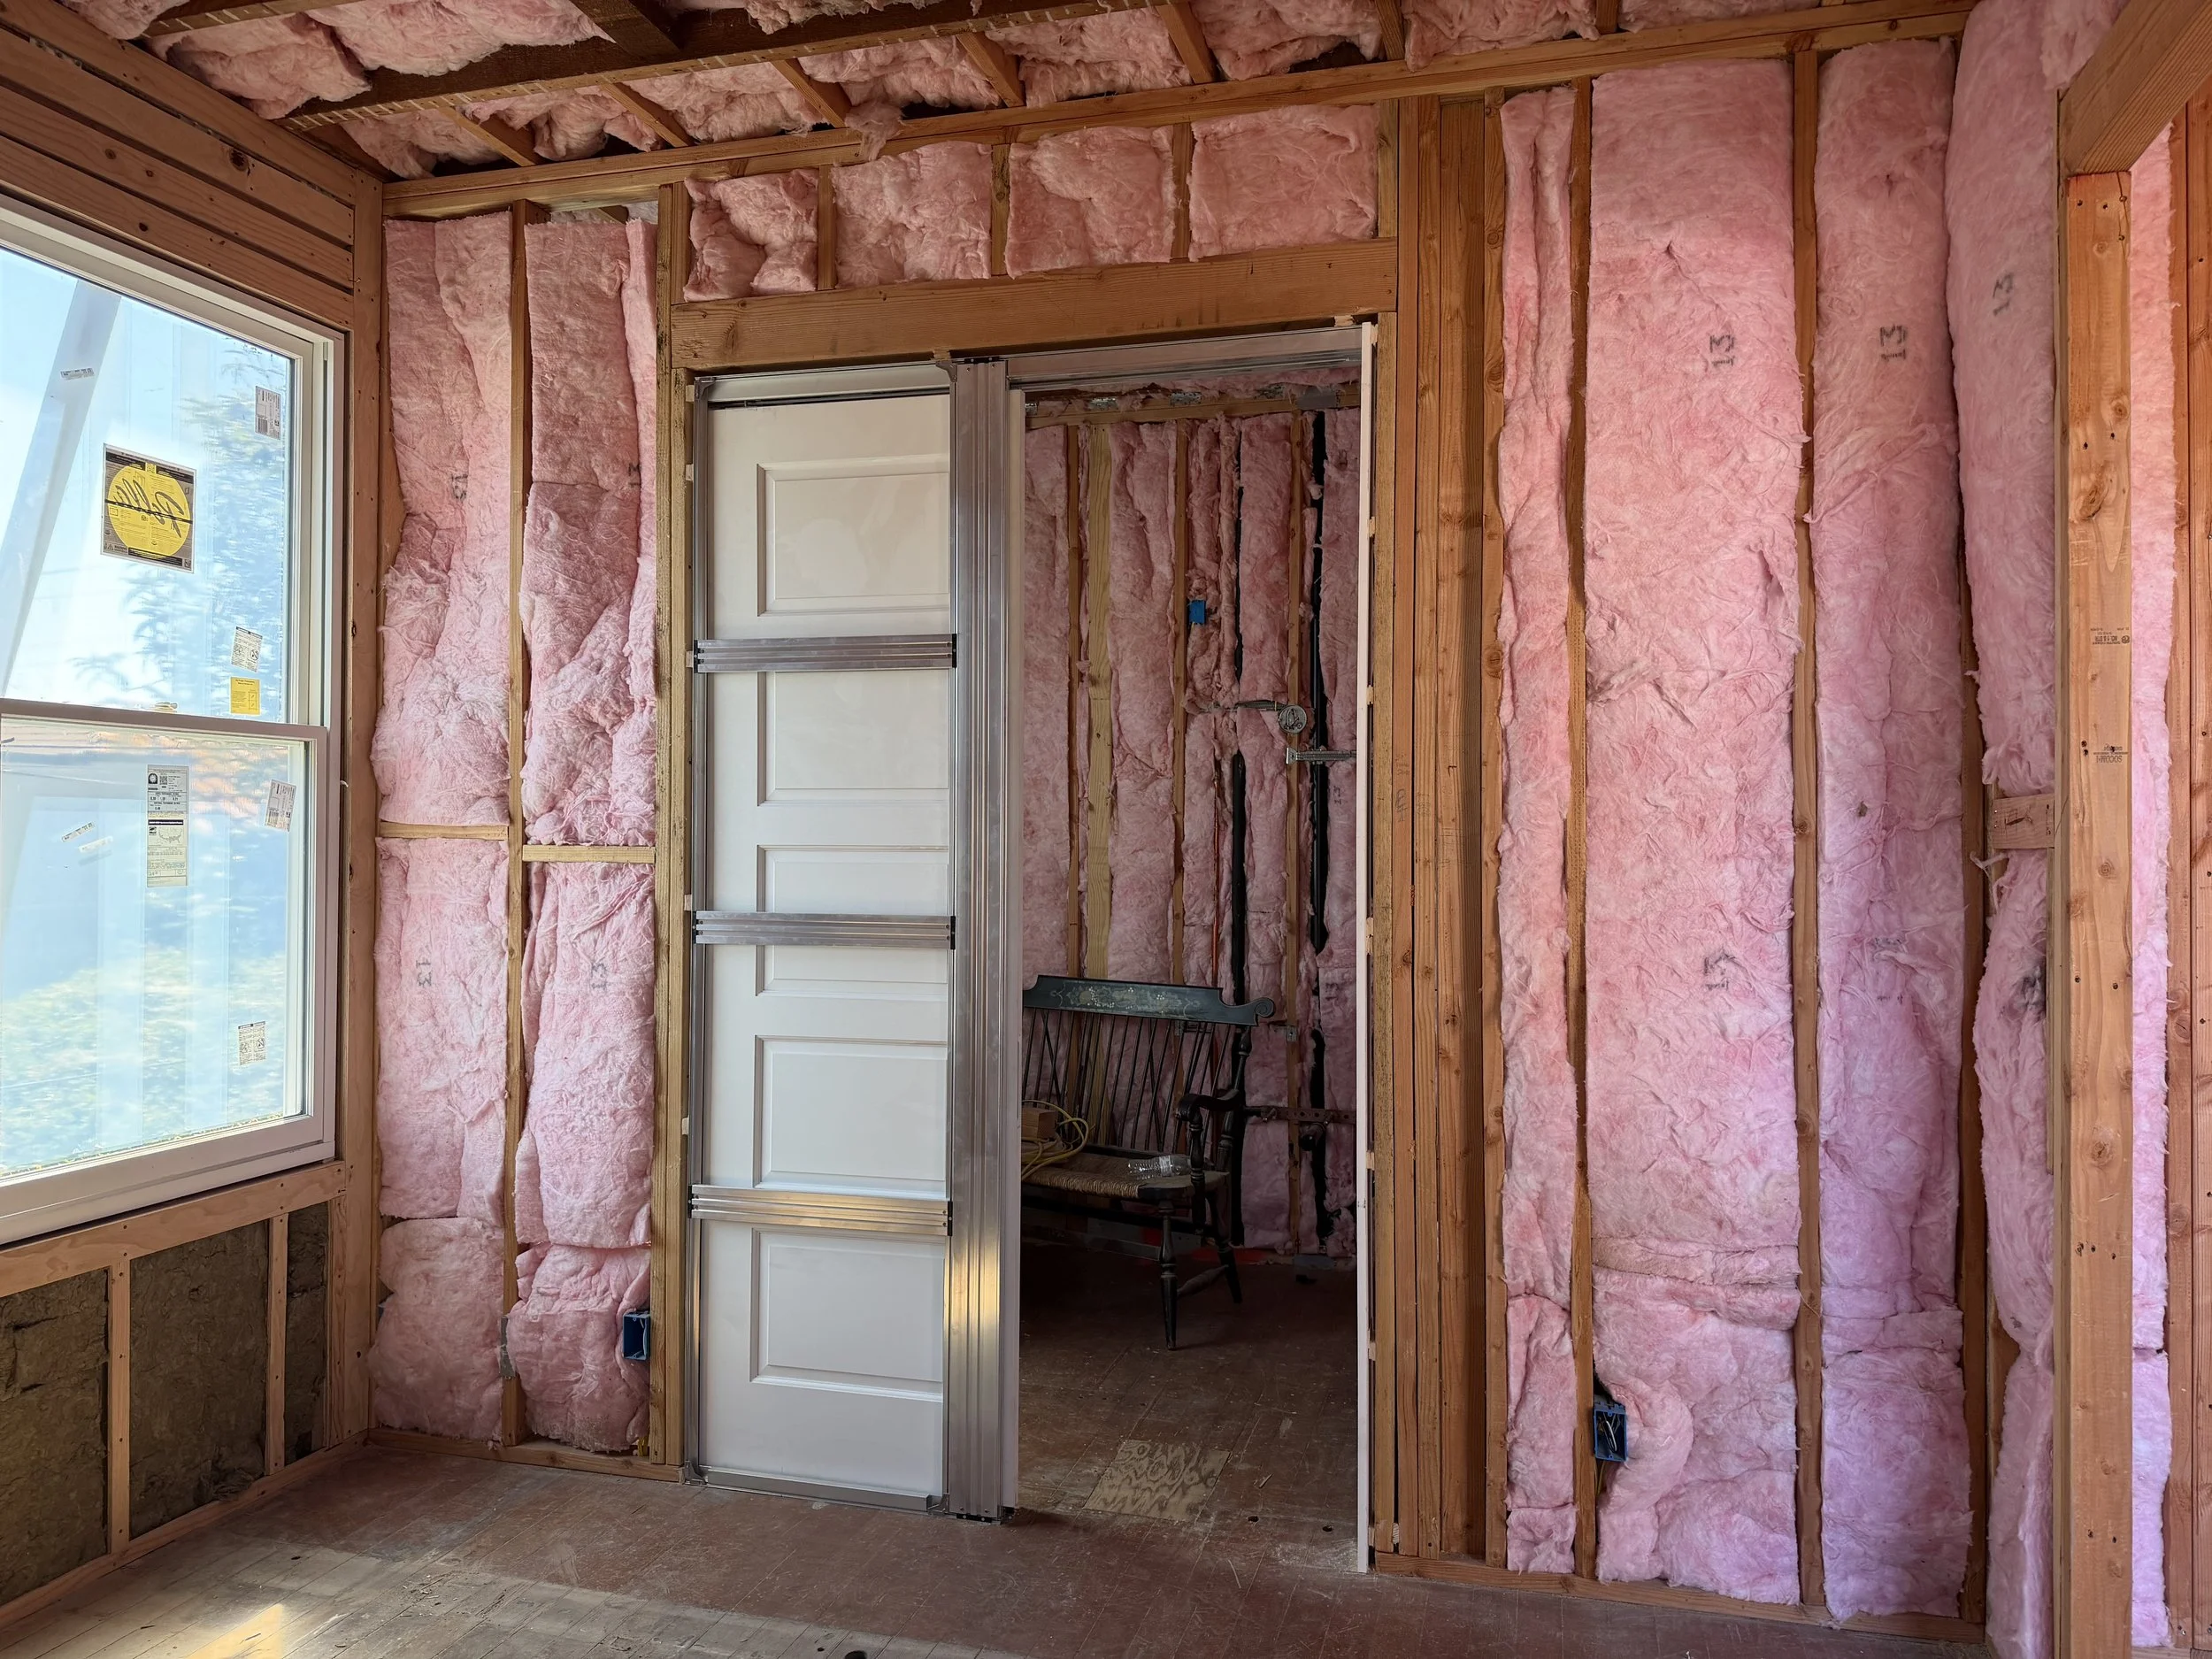
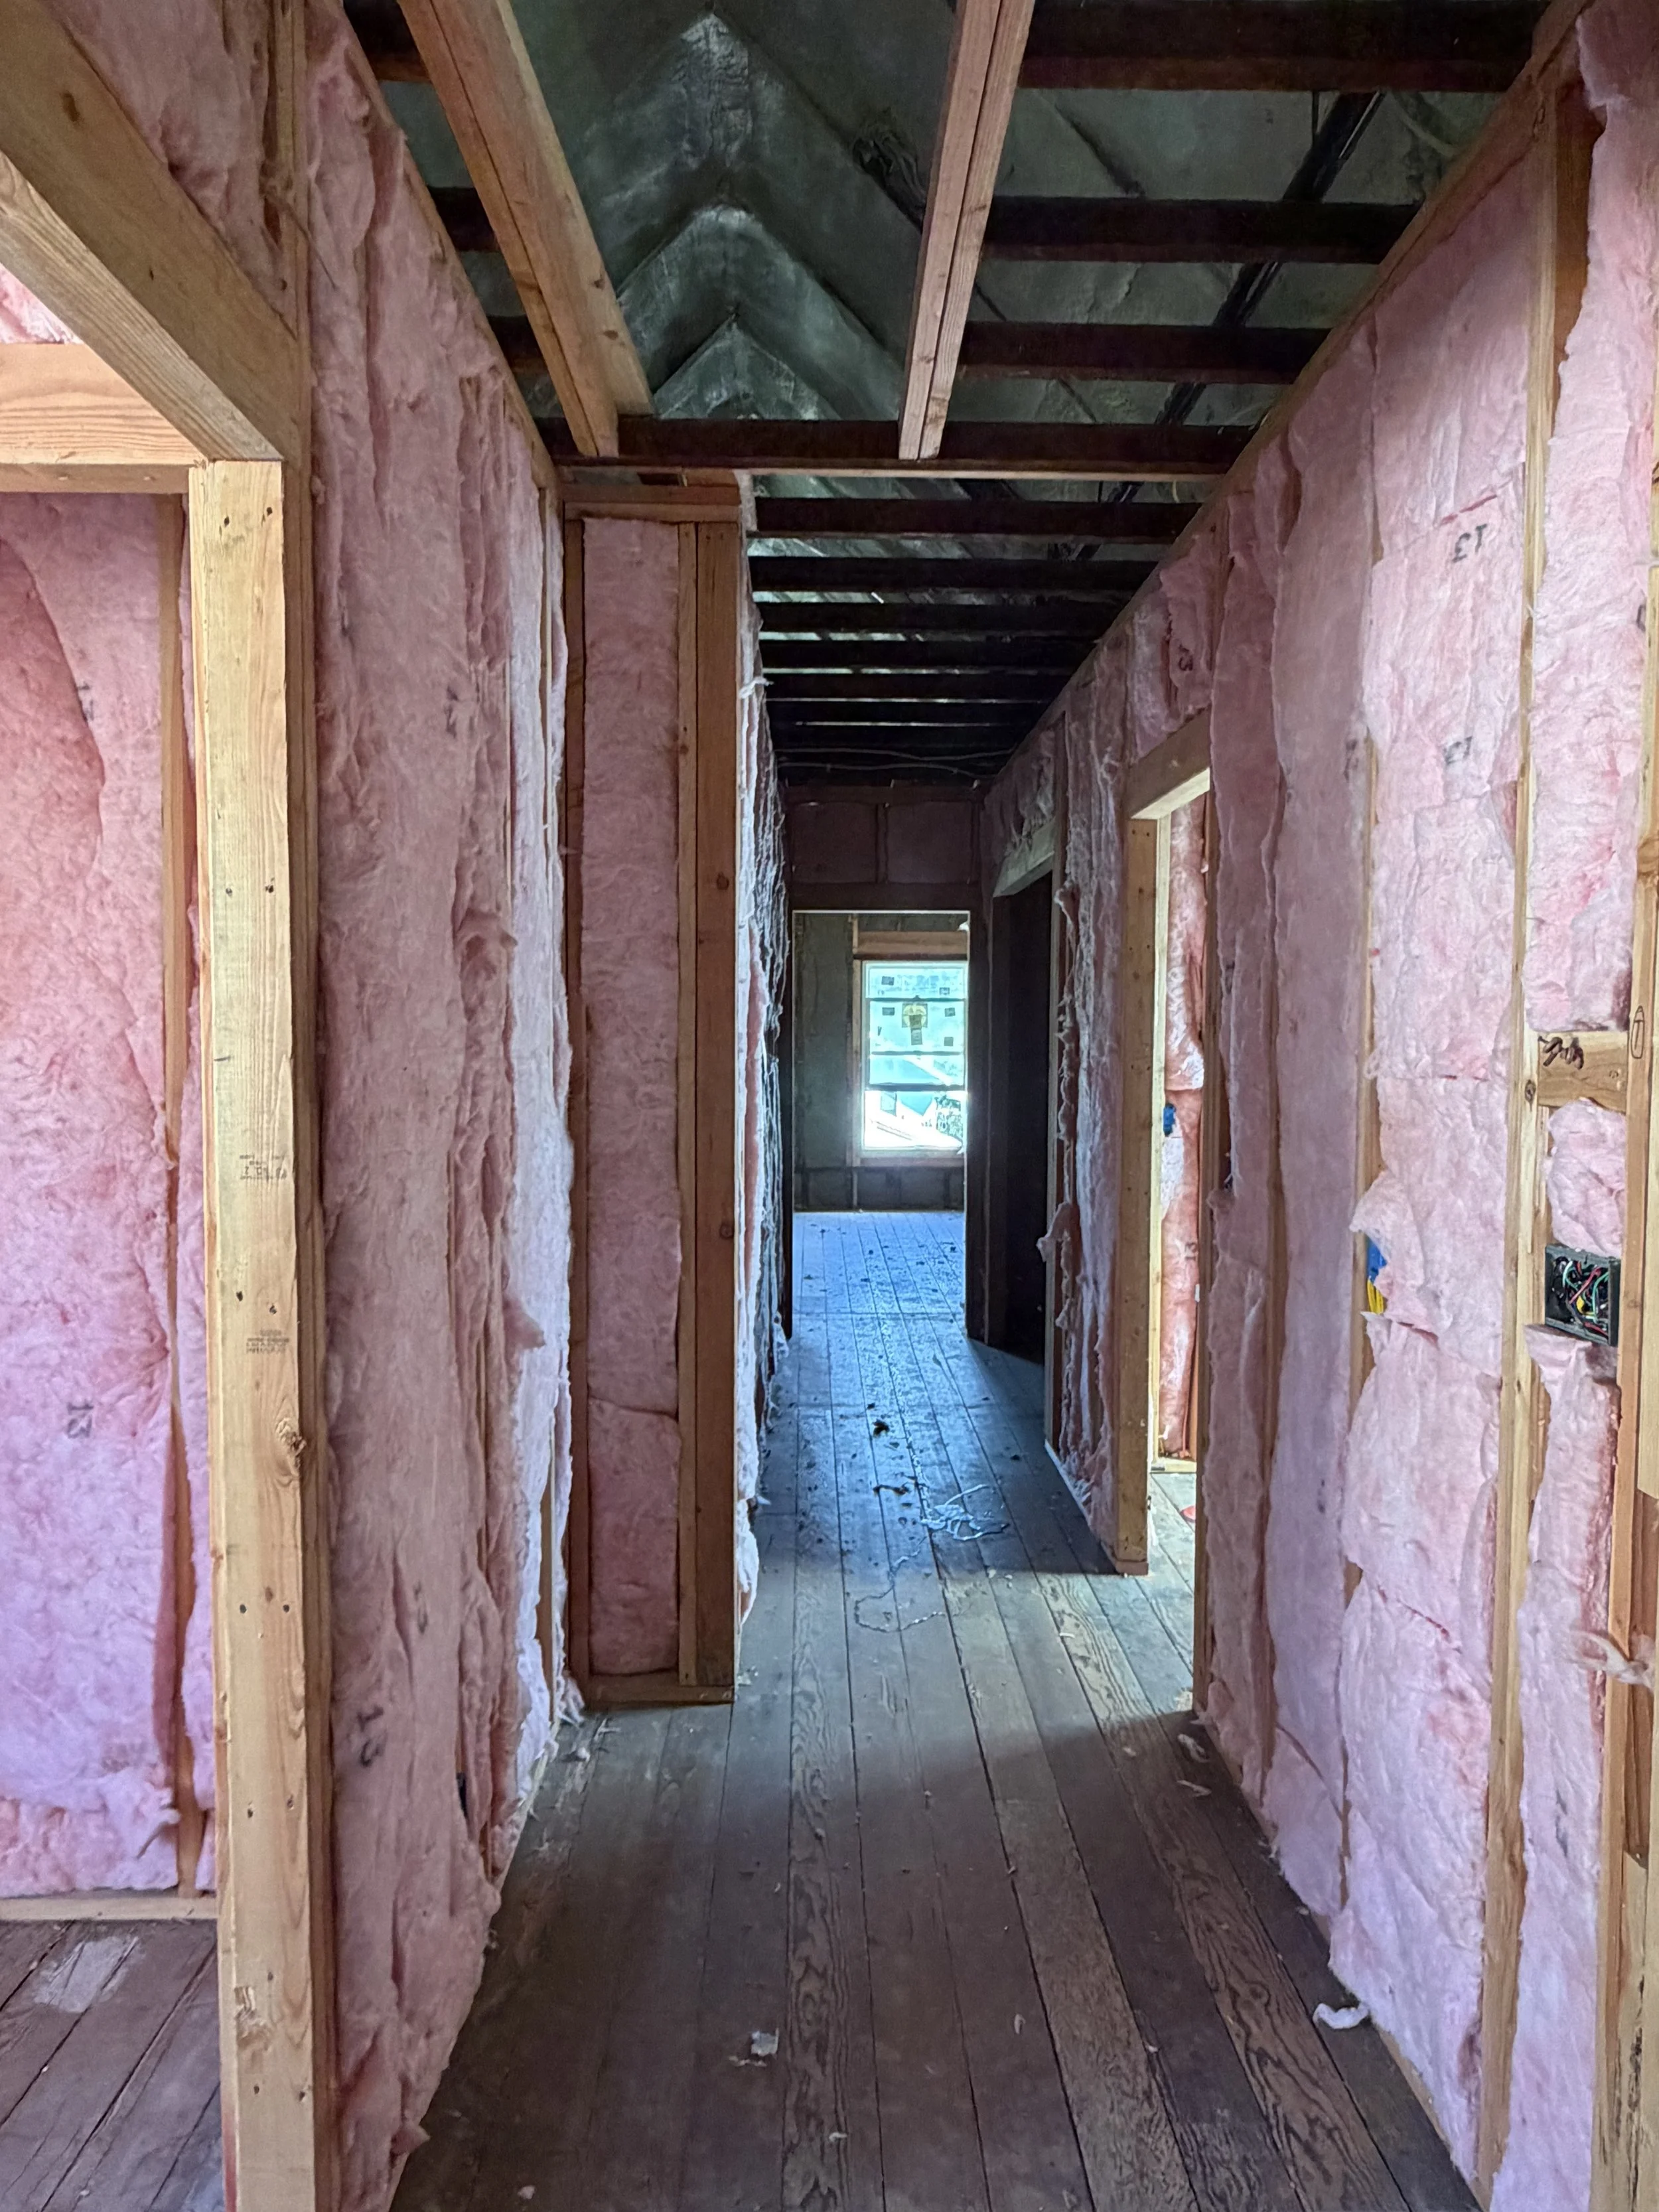
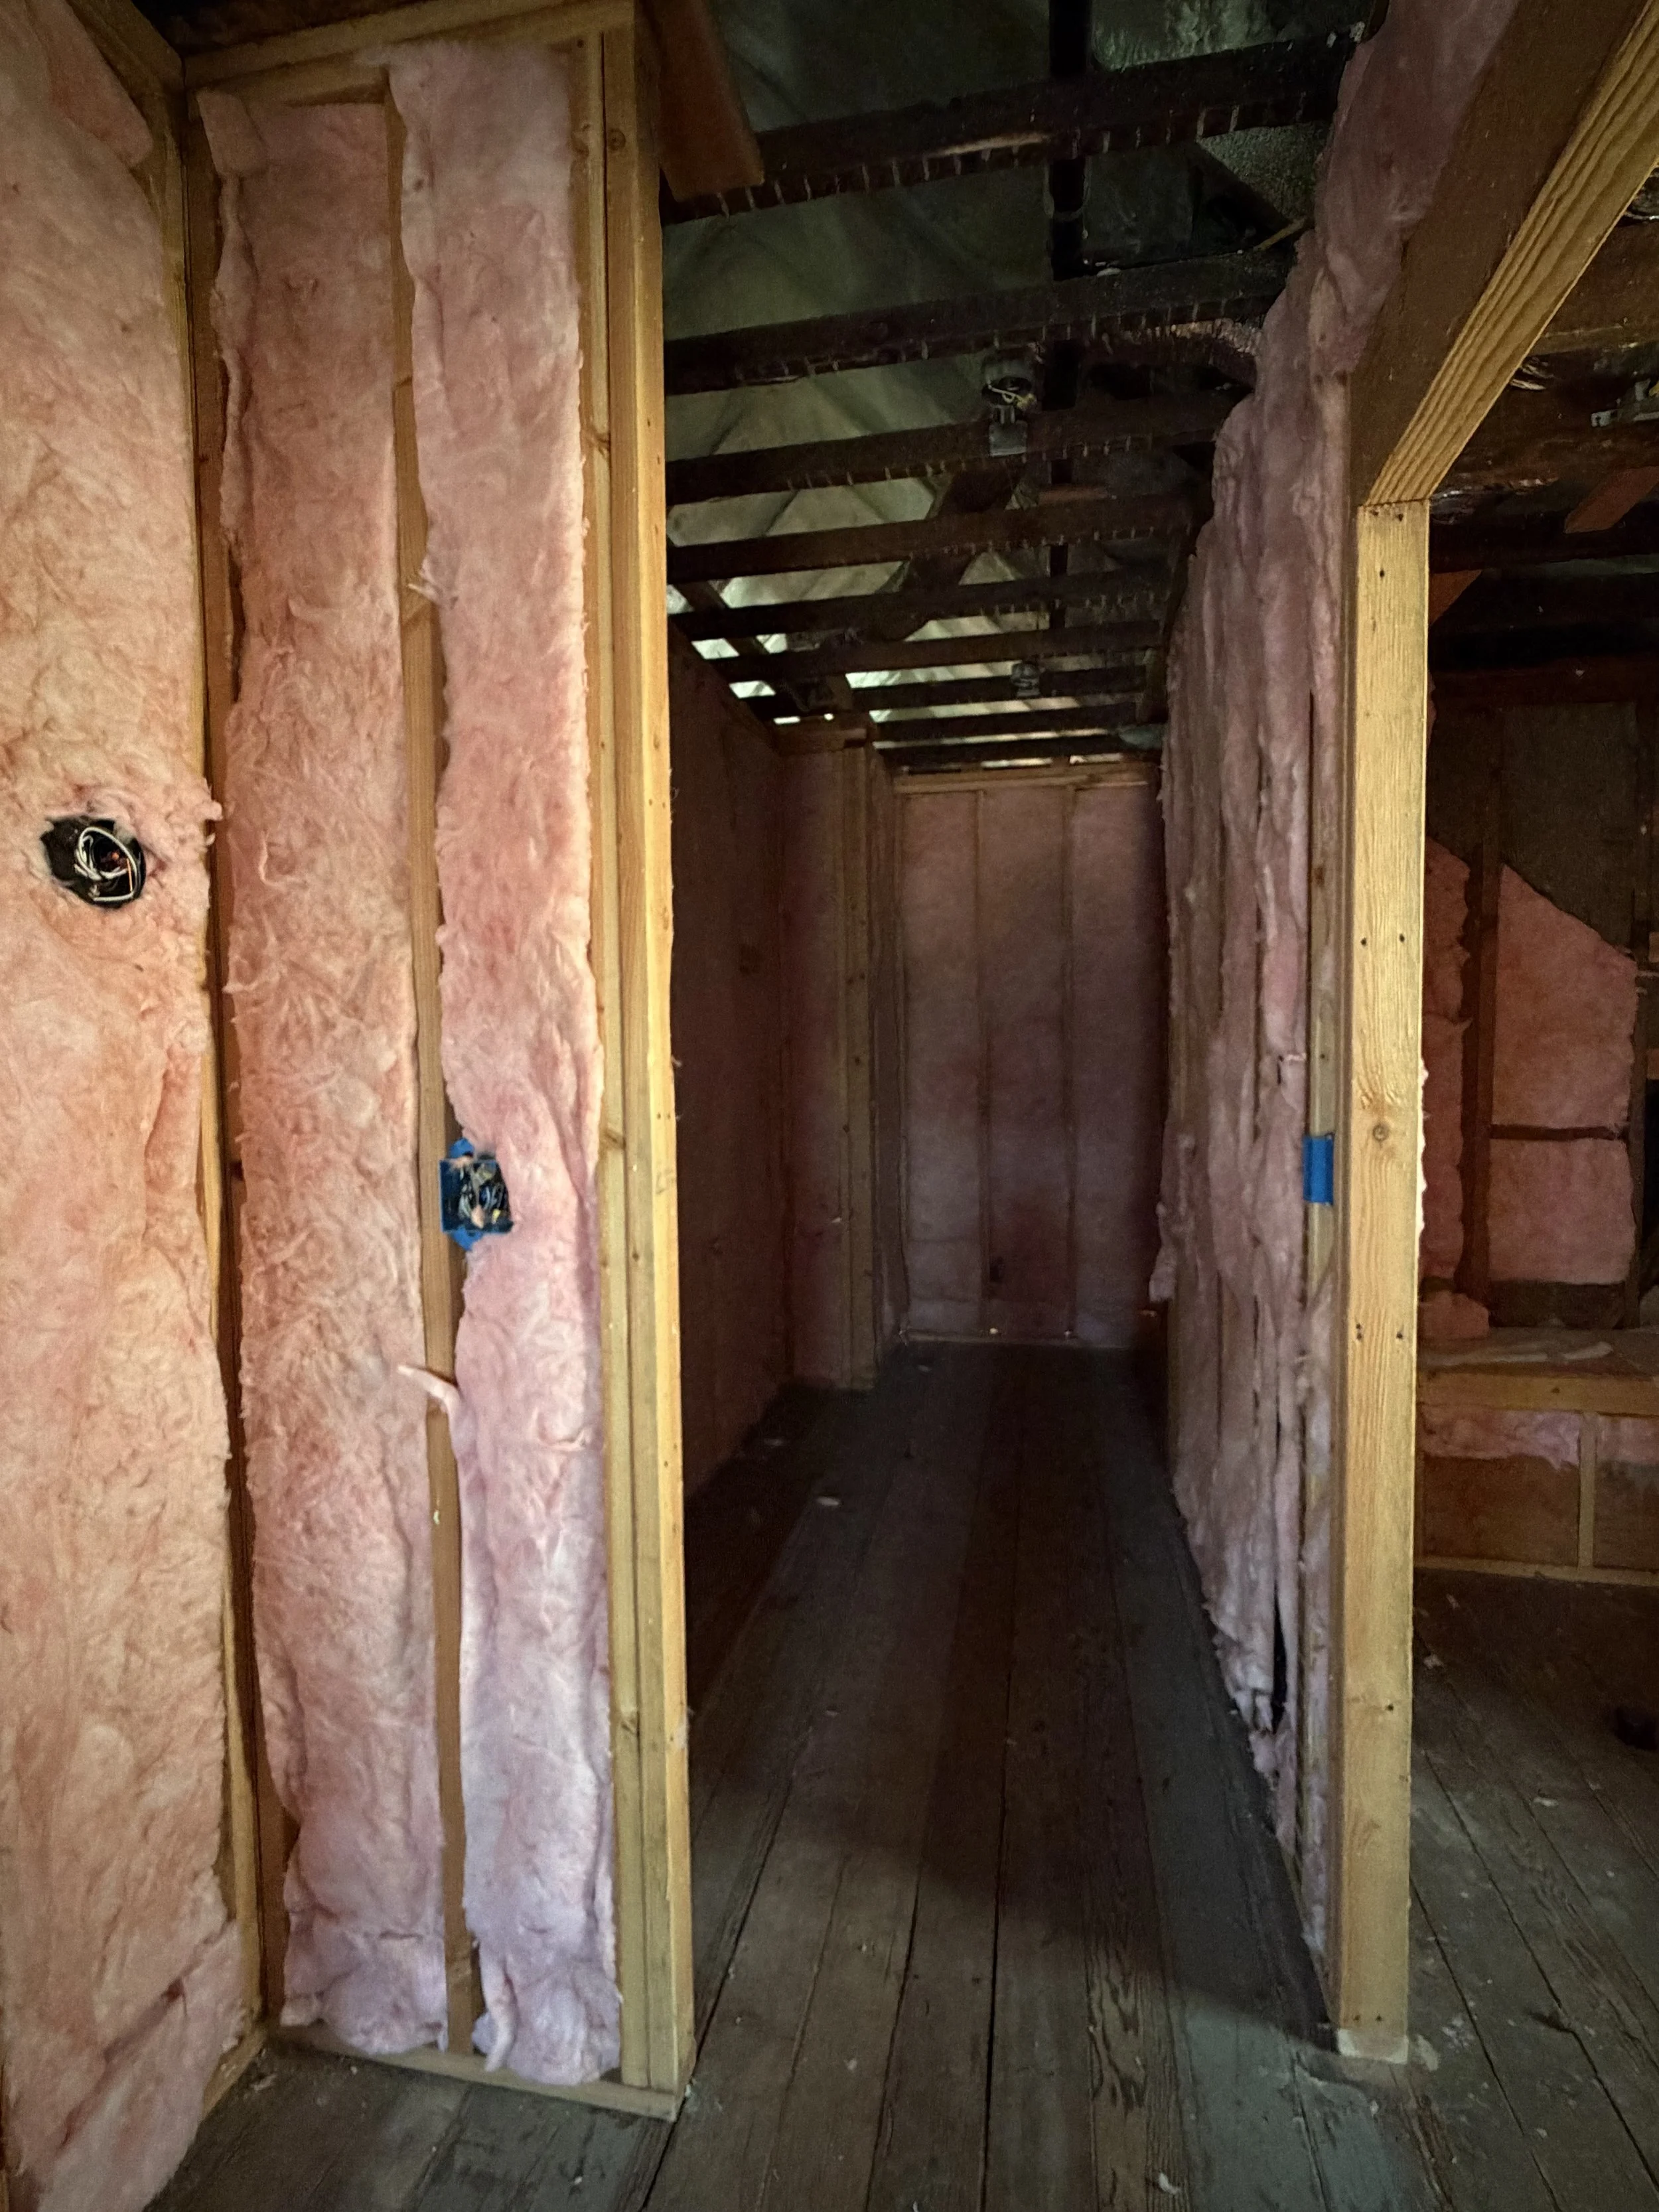
We also made a decision that had nothing to do with the exterior walls. We insulated the interior walls. The goal there wasn't weather protection; it was comfort.
Adding insulation between rooms helps buffer sound and gives the individual spaces another layer of separation. In a house with bedrooms, bathrooms, laundry, gathering spaces, and mechanical systems spread across multiple floors, reducing the amount of sound traveling from one room to another felt worthwhile.
It also complements the three-zone HVAC strategy we discussed in Chapter Five by helping individual spaces maintain their comfort rather than freely exchanging as much heat and sound through hollow interior walls.
It was one of those upgrades that will completely disappear once drywall goes up. But I suspect we'll appreciate it every day.
The Splurge Smart Decision
This is probably the first chapter where my Splurge Smart lesson is less about where we chose to spend and more about when we chose to commit.
We spent significantly more on insulation than ultimately proved necessary. I don't regret taking moisture protection seriously. I don't regret researching the products or wanting to protect the original redwood.
What I would change is the timing. We made a financial decision based on what we understood during an earlier stage of the project. By the time insulation was actually ready to be installed, roughly 70 percent of the exterior siding had been replaced and both our understanding of the house and the available solutions had evolved.
Had we taken the updated conditions back to the market and requested several new bids, I believe we could have achieved the protection we needed for considerably less.
That's an important distinction. The mistake wasn't caring too much about doing it correctly. The mistake was assuming that a price and solution established months earlier still represented the best choice after the project itself had changed.
Sometimes Splurge Smart means investing more. Sometimes it means knowing when to ask the question again.
Lessons from the House
This phase taught me something I wish I had understood much earlier in the renovation: Not every decision needs to be finalized simply because you finally have an answer.
Large renovations evolve. Walls are opened. Conditions are discovered. Materials change. Solutions improve. And the information available six months later may be very different from what you knew when you first began planning.
For decisions that won't be implemented for months, especially expensive ones, I would now revisit both the proposed solution and the price closer to the time the work will actually occur. Get another opinion. Ask whether conditions have changed. Get updated bids. Make sure you're still solving the problem that actually exists, not the problem you anticipated months earlier.
That doesn't mean constantly second-guessing every decision. It means recognizing which decisions are expensive enough, complicated enough, or dependent enough on changing conditions to deserve another look. Insulation was one of those decisions. I learned that one the expensive way.
✓ I'd Do This Again
Take moisture management seriously when insulating an old house. Historic construction doesn't necessarily behave like modern construction, and simply filling an empty wall cavity with insulation without understanding the surrounding materials can create unintended problems.
I'd also insulate interior walls again. The additional sound buffering and separation between rooms should contribute to a quieter, more comfortable home without changing anything about how the finished spaces look.
◇ I'd Think Twice About
Don't lock yourself into an expensive solution too early when the work won't occur for several months. If the conditions surrounding that decision change substantially—as ours did when much of the exterior siding was replaced—revisit the scope before the work begins. And get updated competitive bids. A solution that made perfect sense during the planning stage may no longer be the most efficient or cost-effective approach when it's finally time to install it.
✦ Tips for Homeowners
If you're renovating an older home, don't assume insulation is simply about choosing the highest R-value. Ask how the original walls were constructed. Understand whether a weather barrier exists. Talk about moisture and drying potential. Ask why a particular insulation product is being recommended for a particular location.
And if you're making that decision long before installation, put a reminder on your project calendar: Revisit the scope and rebid before proceeding. That one step could save a significant amount of money.
Closing Reflection
There is something strangely significant about seeing the house at this stage. For months, we've watched every system being built in plain sight. Pipes traveled through framing. Ductwork found its way between floors. Electrical wiring connected rooms that didn't yet look finished. Lighting decisions determined what disappeared inside walls. And finally, insulation filled the spaces between all of it.
Soon drywall will cover almost everything we've spent Part II talking about. The house will begin to look less like a construction project and more like a home. But I'll know what's behind those walls. I'll know the conversations, decisions, compromises, mistakes, lessons, and considerable amount of work that went into everything no one will ever see.
And perhaps that's the most fitting way to end The Hidden Systems. Good design isn't only what remains visible when a room is finished. It's also everything thoughtfully considered before the walls finally close.
End of Part II — The Hidden Systems
With the work behind the walls complete, the house is ready for its next transformation. In Part III, the design decisions we've been planning for months finally begin to come into view.